

Table of Contents
- Understanding Lawn Mower Battery Types
- Voltage Requirements by Mower Type
- Battery Size Reference Chart
- Expected Battery Lifespan
- Battery-Powered vs. Gasoline Mowers
- Benefits of Going Battery-Powered
- Smart Shopping: Where to Buy
- Top 5 Lawn Mower Batteries
- How to Replace a Lawn Mower Battery
- Battery Maintenance by Type
- Winterizing Your Mower Battery
- How to Test Your Battery
Selecting the ideal lawn mower battery is a critical step toward keeping your yard looking pristine with minimal hassle. Batteries differ widely across type, voltage, physical size, and expected lifespan — each factor shaped by the kind of mower you own and the demands of your lawn. Lead-acid options remain popular for their proven reliability and lower upfront cost, while lithium-ion alternatives have surged in demand thanks to their lighter weight and extended longevity. Learning the distinctions between these technologies empowers you to match the right battery to your mower, optimize its performance, and cut down on maintenance headaches. This guide walks you through every aspect of lawn mower batteries — from picking the best one to keeping it running strong for years to come.
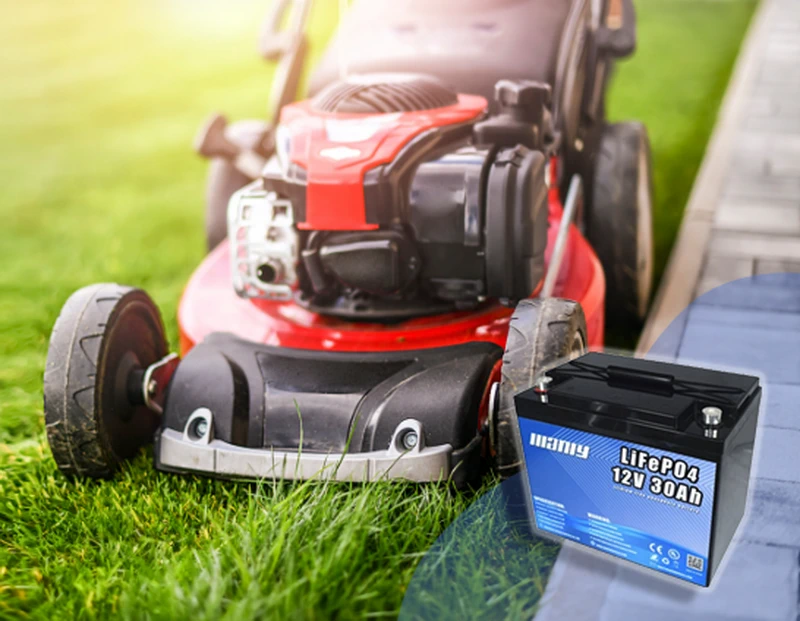
Understanding Lawn Mower Battery Types
Lawn mower batteries are available in several core chemistries, each designed to address different priorities. The right choice for your mower depends on how much weight you can tolerate, how often you want to perform maintenance, and how many seasons you expect the battery to serve you. Here is a breakdown of the main categories:
1. Lead-Acid Batteries
Lead-acid technology is the most established option in the mower world, valued for dependable output at a budget-friendly price. These batteries are heavier than newer alternatives but deliver steady, reliable power. Two sub-types dominate this category:
- Flooded Lead-Acid (FLA): These require hands-on care — you will need to monitor water levels periodically and top off with distilled water to keep them functioning properly.
- Sealed Lead-Acid (SLA): Maintenance-free and mountable in any orientation, SLA batteries are the hassle-free option for homeowners who prefer a set-it-and-forget-it approach.
2. Lithium-Ion Batteries
Lithium-ion cells have become the go-to choice for modern electric mowers, prized for their featherweight construction and exceptional longevity. These batteries commonly use lithium cobalt oxide (LiCoO2) or lithium iron phosphate (LiFePO4) chemistry, delivering outstanding energy density and efficiency. A standard 40V lithium-ion pack provides ample power for residential cutting tasks, recharges in about an hour, and can remain viable for up to a decade with attentive care.
3. Nickel-Cadmium (NiCd) Batteries
While increasingly rare due to environmental regulations and the rise of superior chemistries, NiCd batteries still surface in specialized applications. They handle extreme temperature swings well but are hampered by the "memory effect," which gradually diminishes their usable capacity if they are not fully discharged before recharging.
Bottom line: Every battery chemistry has its strengths — lead-acid for affordability and proven reliability, lithium-ion for lightweight efficiency, and NiCd for niche durability. Weigh your mower's power demands, your maintenance tolerance, and your desired battery lifespan before deciding.
Voltage Requirements by Mower Type
Knowing the correct voltage for your lawn mower is fundamental when shopping for a replacement battery. The majority of riding mowers rely on a 12-volt battery, which provides sufficient cranking power for larger engines and extended runtime. Smaller push models and some older designs may use a 6-volt battery, which handles lighter engine demands adequately.
Different mower styles pair with different voltage ranges. Here is a quick reference:
-
Push Mowers
- Manual Reel Models: No battery needed — purely human-powered.
- Electric Push Models: Generally run on 36V to 40V packs, suitable for small and mid-sized yards.
-
Self-Propelled Mowers
- Electric Self-Propelled: Typically equipped with 40V to 60V batteries, delivering the extra juice needed to drive the wheels while cutting.
-
Riding Mowers
- Standard Riding Models: Use 12V batteries mainly for ignition and accessories.
- Electric Riding Models: Require higher-voltage packs in the 48V to 72V range for both propulsion and blade operation.
-
Zero-Turn Mowers
- Gas-Powered Zero-Turns: Rely on 12V batteries primarily for engine starting.
- Electric Zero-Turns: Need batteries from 48V to 80V for high-output, efficient mowing in commercial settings.
- Robotic Mowers: Operate on batteries between 18V and 28V, ideal for maintaining small to mid-sized lawns with almost no human intervention.
If you are uncertain about your mower's voltage needs, there are a few reliable ways to find out:
- Check the Existing Battery: Voltage is almost always printed on the battery casing — it is the fastest way to confirm the correct specification.
- Review the Owner's Manual: Your mower's documentation lists the required voltage, helping you avoid compatibility mismatches.
- Visit the Manufacturer's Website: Most brands publish detailed battery specs for every model, which is especially helpful when the original battery label has faded or gone missing.
Keep in mind: Higher voltage generally translates to more power and longer run times — ideal for expansive lawns and demanding terrain. Lower voltage batteries work well for compact yards and lighter cutting tasks. Always confirm your mower's specifications to ensure a safe and efficient match.
Battery Size Reference Chart
Choosing the right physical size is just as important as getting the voltage right. Unlike automotive batteries, mower batteries are compact and categorized by battery group numbers that standardize their dimensions. The chart below lists the most common groups you will encounter:
| Battery Group | Length (in) | Width (in) | Height (in) | Voltage |
|---|---|---|---|---|
| U1 | 7.75 | 5.19 | 7.31 | 12V |
| YTX30L-BS | 6.56 | 4.94 | 6.88 | 12V |
| U1R | 7.75 | 5.19 | 7.31 | 12V |
| YTX24HL-BS | 8.06 | 3.44 | 6.38 | 12V |
| 21 | 8.19 | 6.81 | 8.75 | 12V |
| YTX20L-BS | 6.88 | 3.44 | 6.38 | 12V |
| 22F | 9.50 | 6.88 | 7.31 | 12V |
| YTX14-BS | 5.88 | 3.44 | 5.75 | 12V |
| 22NF | 9.44 | 5.50 | 7.19 | 12V |
| YTX12-BS | 5.88 | 3.50 | 5.13 | 12V |
| 24 | 10.25 | 6.81 | 8.87 | 12V |
| YTX9-BS | 5.88 | 3.44 | 4.13 | 12V |
| 27 | 12.06 | 6.81 | 8.75 | 12V |
| YTX5L-BS | 4.44 | 2.75 | 4.13 | 12V |
| 30H | 13.50 | 6.81 | 9.25 | 12V |
| 31 | 13.00 | 6.72 | 9.44 | 12V |
| 45 | 9.44 | 5.50 | 8.75 | 12V |
| 70 | 9.06 | 7.04 | 7.81 | 12V |
| 4D | 20.75 | 8.75 | 9.88 | 12V |
| 8D | 20.62 | 10.95 | 10.17 | 12V |
When replacing your battery, always match the group number listed on your current battery or in your mower's documentation. Batteries sharing the same group designation are cross-compatible regardless of manufacturer, so you can shop across brands with confidence. If in doubt, double-check with the manufacturer's specs to guarantee proper fit and safe operation.
Expected Battery Lifespan
How long a lawn mower battery lasts hinges on its chemistry, how frequently it is used, and how diligently it is maintained. Below is a general lifespan range for each major battery type:
- Lead-Acid Batteries: The workhorse of riding mowers, lead-acid batteries typically deliver 3 to 5 years of service with consistent maintenance — meaning regular charging and clean terminal connections.
- Lithium-Ion Batteries: Renowned for efficiency and stamina, lithium-ion batteries generally last 2 to 5 years by calendar, or roughly 300 to 500 charge cycles. Premium lithium-ion packs, when properly cared for, can push past the 5-year mark and approach a full decade of use.
- Nickel-Cadmium (NiCd) Batteries: These offer 2 to 5 years of service under normal conditions. However, the memory effect can accelerate capacity loss, sometimes necessitating earlier replacement.
Pro tip: Regardless of type, you can stretch your battery's lifespan by avoiding complete discharges, storing it in a cool and dry environment, and always using a charger designed for your specific battery chemistry.
Battery-Powered vs. Gasoline Mowers: A Direct Comparison
Battery-powered mowers now rival gasoline models in terms of overall longevity. While electric mowers typically serve 8 to 10 years, gasoline-powered units may stretch slightly further at 10 to 15 years. Here is a side-by-side breakdown to help you weigh both options:
| Mower Type | Battery Type | Run Time per Charge/Tank | Battery Lifespan | Mower Lifespan |
|---|---|---|---|---|
| Battery-Powered | Lead-Acid | 30–60 minutes | 3–5 years | 8–10 years |
| Battery-Powered | Lithium-Ion | 60–90 minutes | 5–10 years | 8–10 years |
| Battery-Powered | Nickel-Cadmium | 30–45 minutes | 2–5 years | 8–10 years |
| Gasoline | N/A | 1.5–2 hours | N/A | 10–15 years |
A few notes on the table above: "Run Time" reflects a single session on a full charge or tank. "Battery Lifespan" is the expected window before the battery itself needs replacement. "Mower Lifespan" represents the total expected service life of the machine with proper upkeep.
Benefits of Going Battery-Powered
Although gasoline mowers may edge ahead in raw session length, battery-powered mowers bring a compelling list of advantages that are hard to ignore:
- Zero Emissions: Battery mowers produce no exhaust, making them a genuinely eco-friendly choice for your yard and neighborhood.
- Significantly Quieter: Electric motors run at a fraction of the noise level of gas engines — a welcome benefit in residential areas.
- Minimal Maintenance: No oil changes, no spark plug swaps, no fuel filter replacements. Battery mowers dramatically simplify upkeep.
- Effortless Operation: Push-button starts and lighter overall weight make electric mowers accessible to just about anyone.
- Long-Term Savings: While the initial price tag can be higher, you save consistently on fuel and routine servicing over the life of the machine.
- Safer Storage: No gasoline on the premises means no risk of fuel leaks or fume buildup.
- Instant Start-Up: No priming, no cord-pulling — press a button and you are cutting.
- Less Vibration: Smoother operation translates to a more comfortable mowing experience, especially over extended sessions.
- Higher Energy Efficiency: Electric motors convert energy more efficiently, reducing waste compared to combustion engines.
In summary, battery-powered mowers present a strong case for homeowners who value clean air, quiet operation, easy maintenance, and long-term cost savings. These benefits make the switch from gasoline increasingly practical and appealing.
Smart Shopping: Where to Buy Your Lawn Mower Battery
Most homeowners default to big-box retailers or online marketplaces when it is time for a new battery. While these outlets offer convenience, they often carry marked-up prices since they source batteries from manufacturers and add their own margin. Some well-known brands even purchase raw battery cells from third-party producers, rebrand them, and sell at a premium.
To get the best value, consider purchasing directly from a reputable manufacturer or specialized retailer. Buying direct cuts out the middleman markup, giving you access to high-quality products at more competitive prices — and often with better warranty support.
Top 5 Lawn Mower Batteries Worth Considering
Choosing a high-quality battery can dramatically impact your mower's performance and how many seasons it serves you. Here are five top-rated options, each recognized for reliability, durability, and ease of use:
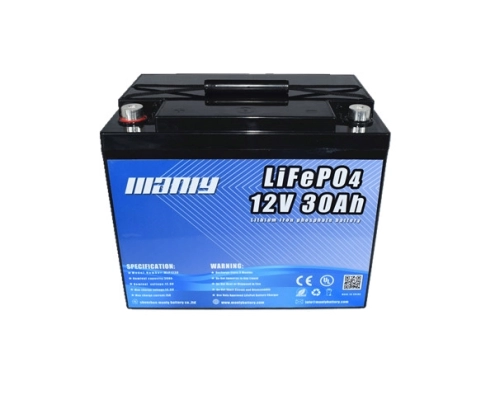
1. LiFePO4 12V 30Ah Lithium Battery
This lithium iron phosphate battery is a premium pick for homeowners who want maximum efficiency packed into a lightweight shell. Designed for extended use, it demands minimal maintenance and delivers an impressive cycle life.
- Capacity: 30Ah — generous runtime for residential mowing.
- Chemistry: LiFePO4, valued for stability and safety.
- Cycle Life: Up to 5,000 cycles for long-term reliability.
- Temperature Range: Functions effectively across a broad range of weather conditions.
- Exceptional lifespan reduces replacement frequency.
- Rapid charging saves time on mowing days.
- Environmentally responsible compared to lead-acid alternatives.
- Higher upfront investment.
- Requires a compatible dedicated charger.
2. NOCO Lithium NLP-9
Engineered for effortless durability, the NOCO NLP-9 eliminates sulfation, activation steps, and ongoing maintenance from the equation. Its built-in battery management system ensures safe, dependable performance, and its quick-charge capability means you are up and running in minutes.
- Features: Bi-directional cell balancing for enhanced safety and longevity.
- Design: Multi-terminal layout enables flexible installation across various mower configurations.
- Charging: Quick-charge technology delivers adequate starting power in as little as five minutes.
- Completely maintenance-free — no acid or water required.
- Ultra-fast recharging capability.
- Versatile installation options.
- Compatibility may be limited to certain mower models.
3. Chrome Battery Lawn Tractor Battery
A dependable lead-acid option built with absorbent glass mat (AGM) technology, the Chrome Battery unit is compatible with a wide array of lawn tractors and garden equipment. It arrives spill-proof, maintenance-free, and ready to install right out of the box.
- Type: Sealed lead-acid with AGM construction.
- Voltage: 12V with a 35Ah capacity.
- Bonus: Ships pre-charged and ready for immediate installation.
- Tough, maintenance-free design.
- Broad compatibility across lawn tractors and devices.
- Solid deep-cycle and solar capability.
- Lead-acid technology may require more frequent replacement than lithium options.
4. Mighty Max ML3512 SLA Battery
The Mighty Max ML3512 is an SLA battery built to handle shock, vibration, and demanding discharge rates. It performs reliably across a wide temperature spectrum and offers a maintenance-free experience.
- Type: SLA with spill-proof, AGM construction.
- Voltage: 12V, rated for both high and low temperature environments.
- Performance: Long-lasting with deep discharge recovery.
- Handles shocks and vibrations — great for varied terrain.
- Multi-position mounting flexibility.
- Durable in extreme temperatures.
- Shorter lifespan relative to lithium-ion batteries.
5. Expert Power EXP 12200 SLA Battery
Known for rugged construction and unwavering reliability, the Expert Power EXP 12200 uses AGM technology to deliver maintenance-free operation even under harsh conditions. It is a solid choice for homeowners who need a dependable workhorse.
- Capacity: 20Ah — well-suited for lawn tractors.
- Operating Temperature: Discharge from -40°C to 60°C; recharge from -20°C to 50°C.
- Design: Spill-proof and resistant to shocks, heat, and chemical exposure.
- Premium materials ensure stability and long service life.
- Performs reliably in extreme temperatures.
- Vibration-resistant — built for outdoor use.
- Slightly lower capacity may limit runtime on larger mowers.
Each of these batteries brings distinct advantages — from the decade-spanning endurance of lithium options to the cost-effective durability of lead-acid models. The best choice comes down to your mower's requirements, your comfort with maintenance, and your budget.
How to Replace a Lawn Mower Battery
Swapping out a spent battery is a simple process that can bring your mower back to peak performance. Follow the steps below to safely remove the old unit and install its replacement.
Removing the Old Battery
Safety First: Power off the mower, remove the key, and wait for the engine to cool completely. Put on gloves and safety glasses to guard against acid exposure or accidental sparks.
Find the Battery: Depending on your mower model, the battery sits under the seat, beneath the hood, or near the engine. Consult your owner's manual if you are not sure.
Disconnect the Negative Cable: Using a wrench, loosen the nut on the negative (black) terminal and remove the cable. Always disconnect the negative side first to prevent electrical shorts.
Disconnect the Positive Cable: Loosen the nut on the positive (red) terminal and remove the cable.
Lift Out the Battery: Release any hold-down straps or brackets. Carefully remove the battery, keeping it upright to prevent spills.
Inspect the Compartment: Look for signs of corrosion or debris. Clean the area with a baking soda and water solution if needed.
Installing the New Battery
Verify Compatibility: Confirm that the new battery matches the old one in voltage, group size, and terminal configuration. Charge it fully if it did not arrive pre-charged.
Position the Battery: Set the new battery into the compartment, aligning the positive and negative terminals correctly.
Secure It: Reattach any hold-down straps or brackets to prevent movement.
Connect the Positive Cable: Attach the red cable to the positive terminal and tighten the nut securely.
Connect the Negative Cable: Attach the black cable to the negative terminal and tighten the nut.
Test the Mower: Insert the key, start the engine, and confirm that the new battery is powering the mower correctly.
Following these steps carefully ensures your equipment stays in top working condition and the new battery performs as expected from day one.
Battery Maintenance by Type
Proper maintenance is the single most effective way to extend your battery's life and guarantee reliable performance throughout every mowing season. Different chemistries have different care requirements, so here is a breakdown by type:
Wet Cell (Flooded Lead-Acid) Battery Care
Wet cell batteries, also called flooded or standard lead-acid batteries, are common in riding mowers. They demand regular attention to stay in peak condition:
- Monitor Electrolyte Levels: These batteries lose water over time through evaporation. If your battery has removable caps, check the fluid regularly and top off with distilled water — never tap water, as minerals can damage internal plates.
- Keep Terminals Clean: Corrosion naturally builds up on terminals during charging cycles. Scrub it away with a baking soda and water solution using a small brush, then apply a corrosion inhibitor spray to slow future buildup.
- Charge Regularly: Wet cell batteries benefit greatly from periodic charging, particularly if the mower sits idle for extended periods. A trickle charger maintains the charge level safely without risking overcharge.
AGM Battery Care
AGM (Absorbent Glass Mat) batteries are sealed and inherently lower-maintenance than wet cell units — they do not lose electrolyte through evaporation. Still, a little periodic attention goes a long way:
- Check and Recharge: Although sealed, it is still wise to check the charge level periodically and top it off as needed, especially if the mower will sit unused for a while.
- Prevent Corrosion: Keep the terminals clean with a baking soda and water mixture. Apply a protective coating to keep corrosion at bay.
Lithium Battery Care
Lithium batteries are celebrated for their low-maintenance nature and long cycle life. A few simple habits can extend their service even further:
- Disconnect for Storage: If the mower will be parked for an extended period, disconnect the battery and top it off with a full charge. Lithium cells hold their charge well for months, making them ideal for seasonal storage.
- Control Temperature: Store lithium batteries in a cool, dry location. Sustained exposure to extreme heat is the primary enemy of lithium cell longevity.
- Clean Terminals Regularly: Wipe down the terminals periodically to prevent corrosion and maintain solid electrical connections.
Universal Maintenance Tips
- Use the Right Charger: Always match the charger to your battery's specifications. Trickle chargers are ideal for long-term storage, and many modern units feature auto-shutoff to prevent overcharging.
- Guard Against Corrosion: Corrosion is a universal issue. Regularly clean terminals with baking soda solution and apply a corrosion inhibitor.
- Prepare for Seasonal Storage: Before winter, fully charge the battery and store it in a cool, dry space. Use a battery box for added protection. For wet cell batteries, verify electrolyte levels before putting the unit away.
- Avoid Full Discharge: Letting any battery drain completely can permanently reduce its capacity to hold a charge. Keep it topped up, especially during long idle periods.
By tailoring your maintenance routine to the specific battery type in your mower, you can ensure dependable performance, prevent premature failure, and get the most value from your investment season after season.
Winterizing Your Mower Battery
Storing your lawn mower battery correctly during the cold months is essential to ensure it is ready to go when spring rolls around. Follow these guidelines to prevent unnecessary wear and maximize battery life:
- Remove the Battery: If the mower will sit unused for an extended stretch, it is best to pull the battery. Leaving it connected can cause gradual discharge, which may make restarting difficult in the spring. Disconnect the negative (black) cable first, then the positive (red) cable.
- Use a Battery Box: Placing the battery inside a dedicated storage box shields it from physical damage, moisture, and corrosive elements, keeping the storage area clean and safe.
- Pick a Cool, Dry Spot: A garage or basement works well. Avoid locations with temperature extremes, as both intense cold and heat can degrade battery performance and shorten lifespan.
- Maintain the Charge: Connect a trickle charger or smart charger to keep the battery at a healthy level throughout winter. Trickle chargers deliver a low, steady current; smart chargers automatically shut off once the battery reaches full charge.
- Clean the Terminals: Before storage, scrub any corrosion off the terminals with a baking soda and water mixture. This prevents further buildup and ensures a strong connection when you reinstall the battery.
- Top Off Water Levels (Wet Cell Only): For flooded lead-acid batteries, check the electrolyte levels and add distilled water if they are low. Never use tap water. AGM and lithium batteries skip this step since they are sealed and maintenance-free.
- Check Monthly: If possible, inspect the battery once a month during storage. Confirm it is holding a charge and top it up with the trickle charger if needed. This routine keeps the battery healthy and ensures it is fully operational come spring.
Following these winter storage practices safeguards the life and performance of your battery, giving you a dependable, hassle-free start to the next mowing season.
How to Test Your Lawn Mower Battery
Regular testing helps you catch problems early — whether your battery needs a simple recharge or a complete replacement. Here is a step-by-step process for evaluating your battery's condition:
Step 1: Safety Precautions
- Protective Gear: Wear safety glasses and gloves to guard against acid exposure.
- Engine Off: Make sure the mower is switched off and the key is removed to prevent accidental starts.
Step 2: Gather Your Tools
- Multimeter: This device measures voltage and is the primary tool for battery testing.
- Battery Charger: Keep one handy in case the battery needs a charge after testing.
- Wire Brush: Useful for cleaning corrosion off the terminals before testing.
Step 3: Locate the Battery
Depending on the mower model, the battery is usually found under the seat, beneath the hood, or near the engine. Refer to your owner's manual for the exact location.
Step 4: Inspect the Battery
- Visual Check: Look for signs of damage, leaks, or swelling — any of these indicate the battery should be replaced immediately.
- Terminal Condition: Check for white or greenish powder on the terminals, which signals corrosion.
Step 5: Clean the Terminals (If Needed)
Use a wire brush to remove any corrosion from the terminals. Clean connections ensure an accurate voltage reading and reliable performance.
Step 6: Test with a Multimeter
Set your multimeter to the DC voltage setting. Touch the red probe to the positive terminal and the black probe to the negative terminal. A healthy 12V battery should read between 12.4V and 12.7V. Anything below 12.0V suggests the battery is significantly discharged and may need charging or replacement.
Step 7: Interpret the Results
- 12.4V–12.7V: Battery is in good health.
- 12.0V–12.4V: Battery is partially discharged — recharge and retest.
- Below 12.0V: Battery is deeply discharged or failing. Recharge and test again; if it still reads low, replacement is recommended.
Remember: Regular battery testing — ideally at the start and end of each mowing season — helps you catch issues early and ensures your mower is always ready to perform when you need it.
Power Your Lawn the Right Way
Armed with this guide, you have everything you need to select, maintain, and maximize the life of your lawn mower battery. Browse our curated selection of outdoor power equipment and keep your yard looking its best — season after season.
Worx 40V Cordless MowerDoorBird D1101V Intercom