

This guide draws on years of hands-on experience heating homes with mini-split systems in harsh Northern climates. Originally inspired by real-world installations in New England, the advice below has been tested through multiple winters and proven effective.
Mini-Splits in Freezing Climates? Absolutely.
A growing number of homeowners are discovering that ductless mini-split heat pumps can serve as a reliable primary heat source — even in areas where temperatures regularly plunge well below freezing. One homeowner installed a ¾-ton Fujitsu air-source mini-split in a historic 1,500-square-foot cape-style home in Massachusetts and found it transformed how the house stayed warm.
During the first full heating season, the system consumed roughly 1,757 kWh. The following milder winter brought that figure down to about 1,247 kWh. Paired with a modest solar panel array, the home's heating became almost entirely green — with solar covering approximately 200% of total electrical use.
The takeaway is clear: with the right approach, a mini-split can handle cold climates remarkably well. Below are seven proven strategies for making it work.
Reduce Your Heating Load First
Before investing in any heating equipment, address the building envelope. Seal drafts, add insulation where it's lacking, and upgrade windows if possible. A tighter, better-insulated home means you can install a smaller, less expensive mini-split system — and it will work far less to maintain comfortable temperatures. Reducing heat loss is the single most impactful step you can take to improve any heating system's effectiveness.
Size It for Typical Cold, Not Extreme Cold
Heat pump output decreases as outdoor temperatures drop. Rather than oversizing the unit for the coldest possible night, it's smarter to size the system for typical low temperatures — say around 10°F. For the rare occasions when it dips further, a simple electric resistance backup can cover the gap.
Keep in mind that a mini-split cannot rapidly bring a freezing-cold house up to temperature. During unoccupied periods, set it to around 60°F, and when you're away for extended stretches, dropping it to 50°F is reasonable. At that lower setpoint, most units keep air gently circulating to prevent cold pockets from forming in the space.
Expect a Little Background Noise
The indoor head unit isn't silent. It produces a gentle, variable whooshing sound as it operates. For most people this becomes easy background noise, but if you're particularly sensitive to sound, visit a home that already has one installed and listen for yourself before committing. If absolute silence matters to you, a mini-split may not be the ideal fit.
Let It Snow — Just Not on Your Compressor
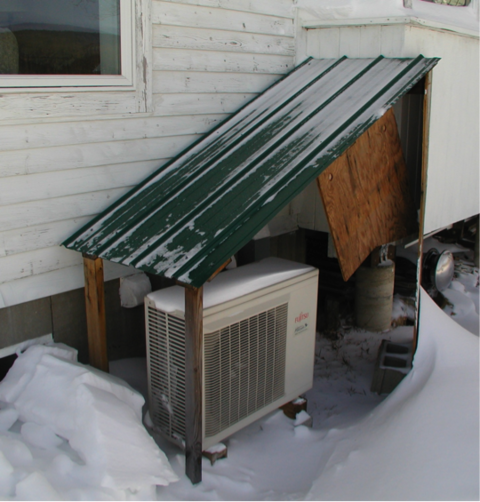
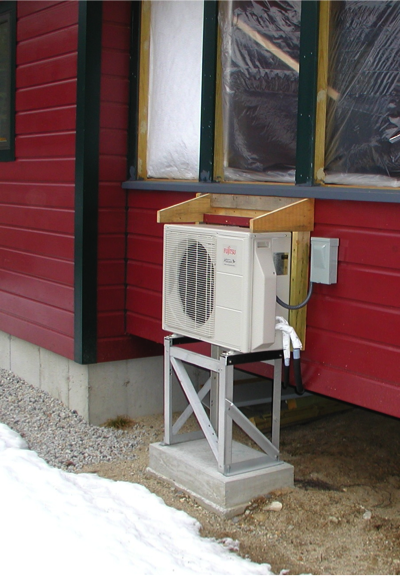
Your outdoor compressor unit should sit at least two feet above ground level and be shielded by a roof or protective cover that allows airflow while keeping snow off. During normal operation, the evaporator pulls moisture from the air, which freezes and gets melted away during defrost cycles. The melt-water drains underneath and can build up into a small ice formation — this is normal and doesn't significantly affect performance.
The real problem occurs when snow packs into the evaporator coils. Melting that snow costs energy without producing any heat for your home. Worse, if the compressor sits low enough to get buried, it can spend more time defrosting than actually heating. Keeping the unit elevated and sheltered is essential.
💡 Pro Tip: Some installations draw air from an enclosed porch space, pulling it in at low velocity through gaps in the floorboards. Snow drops out of the air before reaching the evaporator, and the porch space naturally warms on sunny days — boosting efficiency further.
Mount the Indoor Unit Low for Better Heating
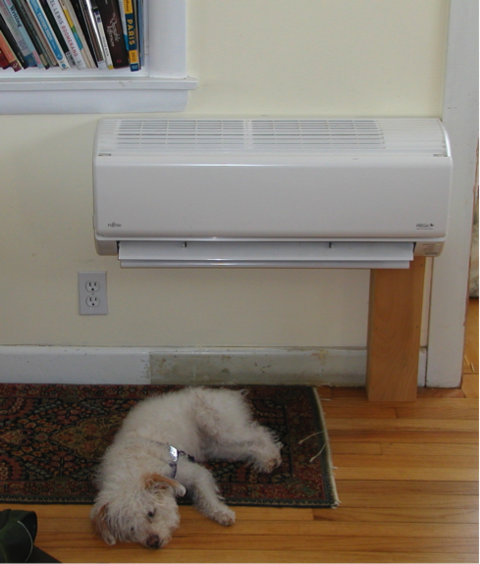
When your primary goal is heating, position the indoor unit about 18 inches above floor level with a clear, unobstructed line into the room. Low mounting offers several meaningful advantages for winter performance:
It draws in the coolest air near the floor, which helps the system run more efficiently. The warm output spreads across the floor plane and blends with cooler air at ground level, creating more even heat distribution. Because the airflow isn't blowing straight down from the ceiling, occupants experience far less draft discomfort. And from a practical standpoint, a low-mounted unit makes filter access and cleaning much more convenient.
Get the Refrigerant Line Lengths Right
The refrigerant lines connecting the outdoor compressor to the indoor unit should be at least 15 feet long to prevent noise transmission between the two components. Manufacturers do allow longer runs, but keep in mind that every additional foot of tubing slightly reduces system efficiency. Striking the right balance between comfortable noise isolation and minimal line length will help you get the best performance from your installation.
Prioritize Efficiency in Warmer Cold Climates
When shopping for a mini-split, you'll encounter two key metrics: the Heating Seasonal Performance Factor (HSPF) and the minimum operating temperature. In regions where winter temperatures mostly stay above 20°F, lean toward models with higher HSPF ratings — that's your efficiency number, and it will save you money over the long haul.
In colder zones where temperatures regularly drop to –10°F or below, you'll need a unit rated for those extremes even if its efficiency score is slightly lower. The best-performing cold-climate models can achieve an HSPF of 12.5 Btu/Wh or better, which represents outstanding efficiency for a heat pump operating under harsh conditions.
Featured Product
Ready to Heat Smarter This Winter?
Pair these tips with a high-performance mini-split system built for cold-climate demands. The Senville LETO series delivers efficient heating and cooling in a single, easy-to-install package.
Senville LETO 18000 BTU Mini Split