

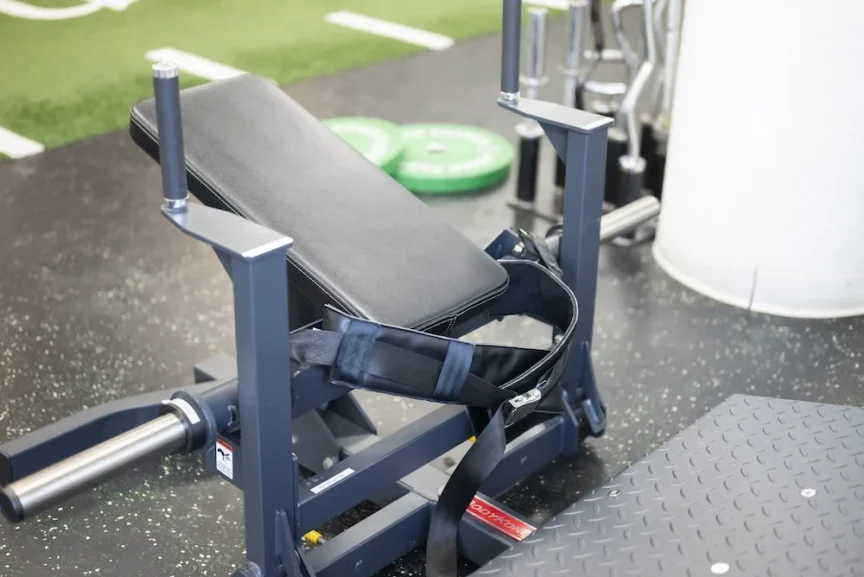
 The hip thrust machine has quickly become one of the most reliable tools for strengthening your glutes. If you spend most of your day seated at a desk, your glute muscles stay switched off for hours on end—and when they're not working, they're not getting any stronger.
The moment you step away from your chair, however, your glutes take center stage. Every step you take, every run, every squat, and every flight of stairs you climb relies on their ability to generate power, drive movement, and keep your body stable. That's why folding a dedicated glute exercise into your weekly routine is such a smart move.
Thanks to their adaptability across all experience levels and their well-documented ability to deliver real results, hip thrusts have earned a permanent spot in almost every serious glute program. A hip thrust machine takes the guesswork out of the movement, helping lifters dial in their form and steadily load more resistance—making it one of the most effective and controlled ways to isolate the glutes.
You can certainly perform hip thrusts without a dedicated setup. However, barbell variations demand significantly more skill and technique to execute safely, which is why a purpose-built machine is such a welcome alternative for lifters of every level.
Setting Up the Machine
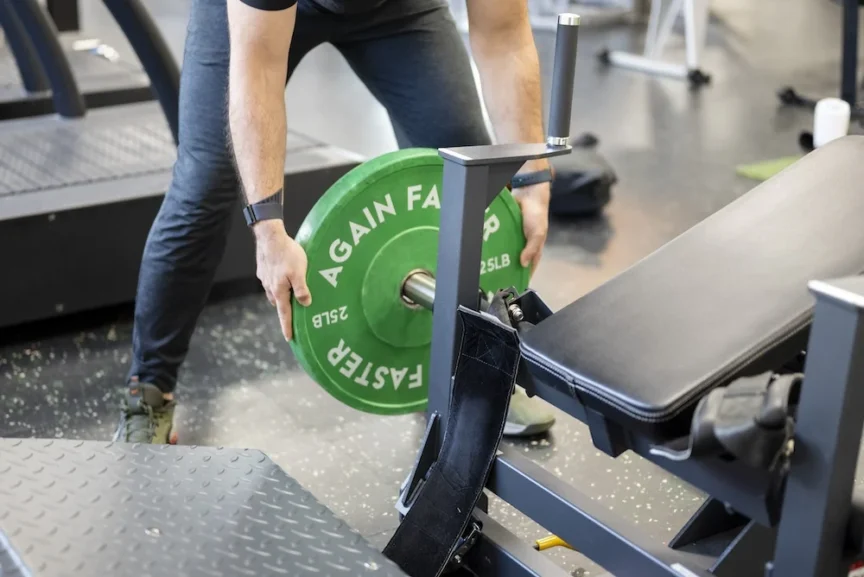 The only real setup decision you'll face is choosing the right weight. Our commercial-grade hip thrust machines are engineered to handle loads of up to 360 pounds (180 pounds on each side), giving you plenty of room to progress as you get stronger.
For most beginners, 350 pounds is far too heavy to start. The lower body houses some of the largest and most powerful muscles in the human body, which makes it tempting to go straight for the big plates—resist the urge.
If you're brand new to the movement, skip the plates entirely for your first few reps and focus on feeling the motion. More experienced lifters can begin with a light warm-up weight to lock in form. A solid rule of thumb: start with roughly half your bodyweight and build from there.
Once you've settled on your starting load, slide the plates evenly onto the bars on both sides of the machine. Balanced loading isn't optional—uneven weight can twist the machine, injure you, or damage the equipment itself.
Using the Machine
Begin by lying down on the back pad and securing the waist strap snugly across your hips. Most machines use either a buckle belt system or a ratcheting buckle—whichever yours uses, cinch it firm enough to stay in place, but never so tight that it restricts your breathing.
Next, set your feet. They should sit roughly shoulder-width apart, with toes turned out slightly. Depending on your height, you'll place them higher or lower on the platform—taller lifters generally sit lower, shorter lifters higher.
With your feet planted, drive your hips upward until your legs reach full lockout at the top. This gives you the clearance needed to release the two safety levers on either side. Now you're ready for your first rep.
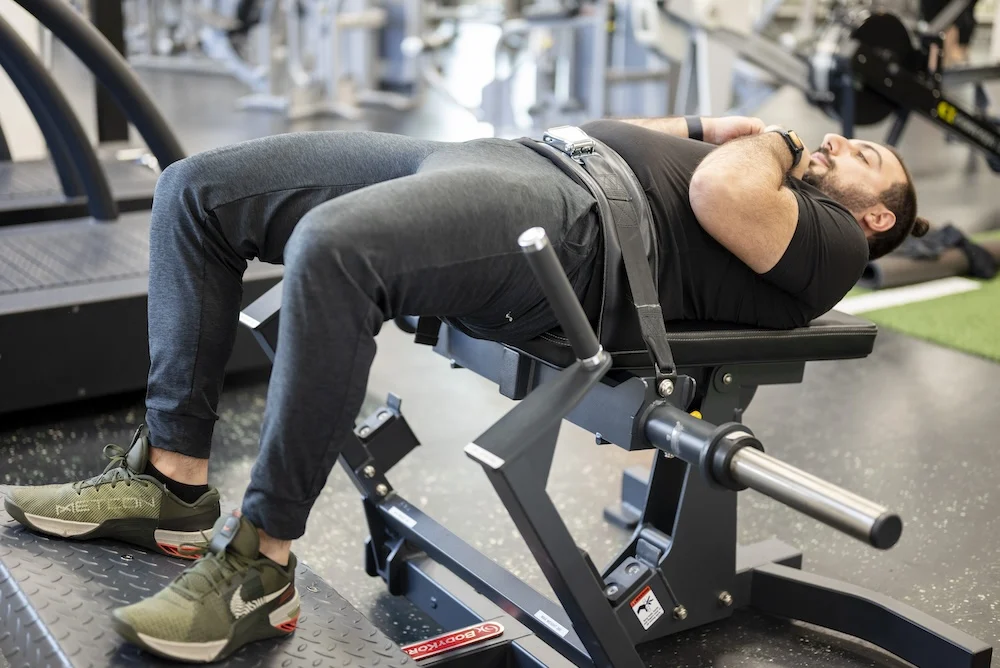 Lower your hips toward the starting position under full control. Go as deep as your mobility allows, but stop short of letting the bottom of the machine clang against the floor. Your legs should stay tensed throughout, and your core should remain braced for the entire set.
From the bottom, explode upward toward the ceiling. The drive phase should be quick and powerful—this is where the glutes earn their keep. Stop when your torso forms a straight line with your thighs and your knees sit at a clean 90-degree angle.
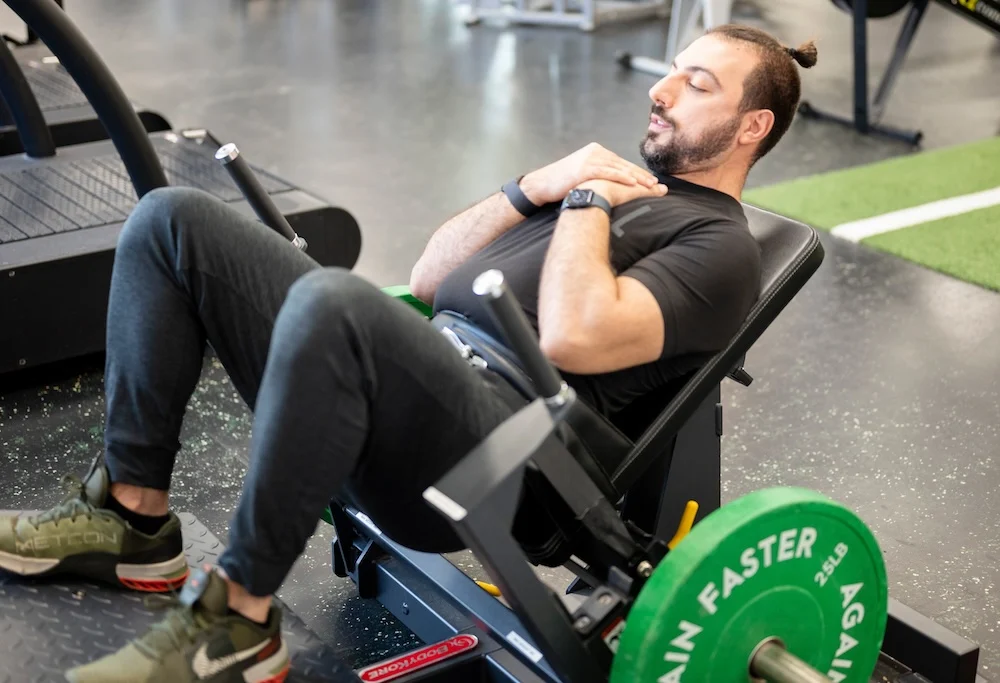 Be careful not to over-extend at the top of the lift. Pushing your hips too far past neutral can strain the lower spine and irritate surrounding muscles, and it's a common cause of injury. Well-designed hip thrust machines help prevent this with proper setup—but it's still your job to aim for full extension, not hyper-extension. Keep every rep controlled and intentional.
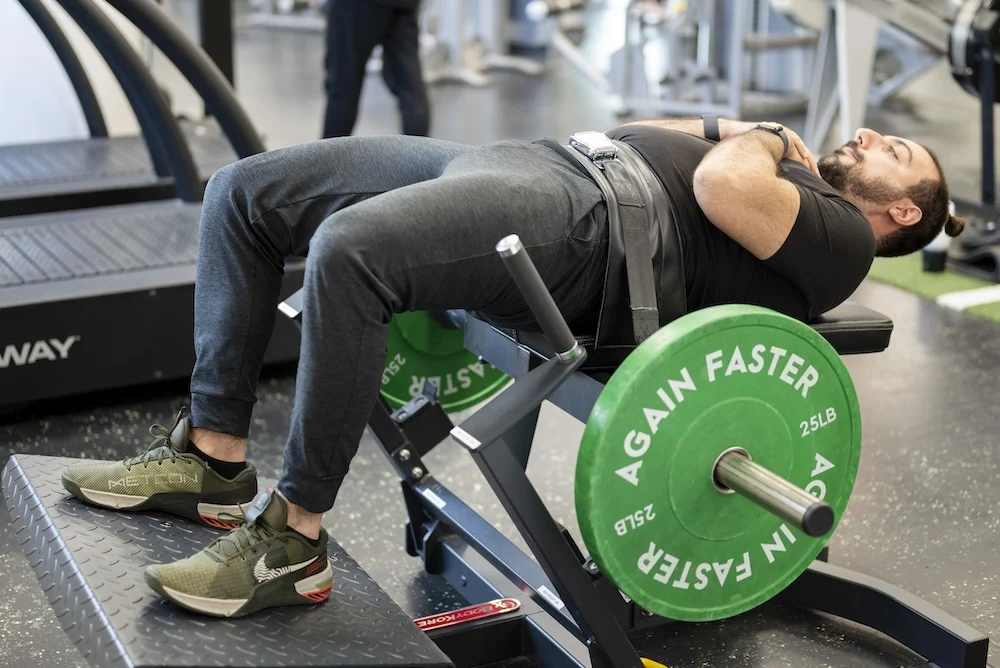
From the locked-out position, lower your hips slowly back to the start. Stay deliberate on the way down and keep your legs and core engaged the whole time. If you're pushing heavy weight, pause briefly at the bottom before your next rep. Continue until you've hit your target number of reps.
When you finish your set, return to the extended position and pull the safety handles back toward you to re-lock the machine. Unfasten the waist strap, and you're ready for whatever's next on the training board.
Quick Tips for Beginners
Start Light
Prioritize clean form over heavy plates. Add weight only once the movement feels second nature.
Brace Your Core
A tight midsection protects your spine and transfers more force through your hips.
Balance The Load
Always match the plates side to side. Uneven loading invites injury and strains the frame.
Full Range, Controlled
Drive explosively up, lower slowly down. Never bounce the weight at the bottom.
Ready to Build Your Home Setup?
Train your glutes with gym-grade performance in your own space.
Shop Nautilus Glute Drive