

In This Guide
◆ What Is a Sewer Inspection Camera?
◆ How Drain Cameras Work
◆ Types of Drain Cameras
◆ Key Specifications That Matter
◆ How to Operate a Drain Inspection Camera
◆ Buying Guide: Matching the Camera to Your Needs
◆ ROI & Cost of Ownership
◆ Maintenance for Longer Camera Life
◆ Troubleshooting Common Issues
◆ See More, Guess Less
◆ FAQs
When you arrive at a sewer or drain service call, there are really only two options: take a wild guess at what's happening underground, or actually look for yourself. A sewer inspection camera delivers instant clarity, cuts down on wasted time, minimizes return visits, and lets you show customers exactly what needs fixing. In this guide, we'll cover everything about drain inspection cameras — what they are, how they function, which specs you should care about, and how to maximize your return on investment. You'll also pick up professional maintenance and documentation tips that most guides overlook entirely.
What Is a Sewer Inspection Camera?
A sewer inspection camera — sometimes referred to as a drain camera, pipe camera, mini-camera, or drain inspector — is essentially a compact, waterproof camera mounted on a lengthy coil of fiberglass cable known as a "push rod." This push rod connects to a control box that features either a built-in viewing screen, a Wi-Fi or Bluetooth interface (for streaming to your tablet or phone), or both. The camera head itself is equipped with powerful LEDs for illumination and frequently includes a built-in locating beacon called a sonde, which allows you to pinpoint the exact position and depth of an issue from above ground. Plumbing professionals rely on these cameras to visually inspect drain lines of all sizes, from small residential laterals to larger mainline sewers and area drains.
How Drain Cameras Work
These portable camera systems reveal things no amount of guessing could ever confirm — cracks, root intrusions, grease buildup, scale deposits, and offset pipe joints. They aren't meant to replace jetting or mechanical cleaning, but they serve as the critical eyes that guide your approach and help you make confident recommendations to homeowners or business clients.
Drain camera systems are made up of a few straightforward components:
Camera Head — A small, waterproof unit, usually with color imaging and often with a "self-leveling" orientation that keeps the view upright.
LEDs — Mounted on or around the camera head to light up the dark interior of the pipeline.
Push Rod — A fiberglass-reinforced cable that lets you feed the camera through the pipe smoothly.
Control Unit — Delivers a live video feed via an onboard screen and/or wireless connection, typically with recording, on-screen footage counter, and text or voice notation capabilities.
Sonde — A transmitter that emits a radio signal detectable by a locator device (sold separately), letting you map a pipe's route and depth — especially where defects are found.
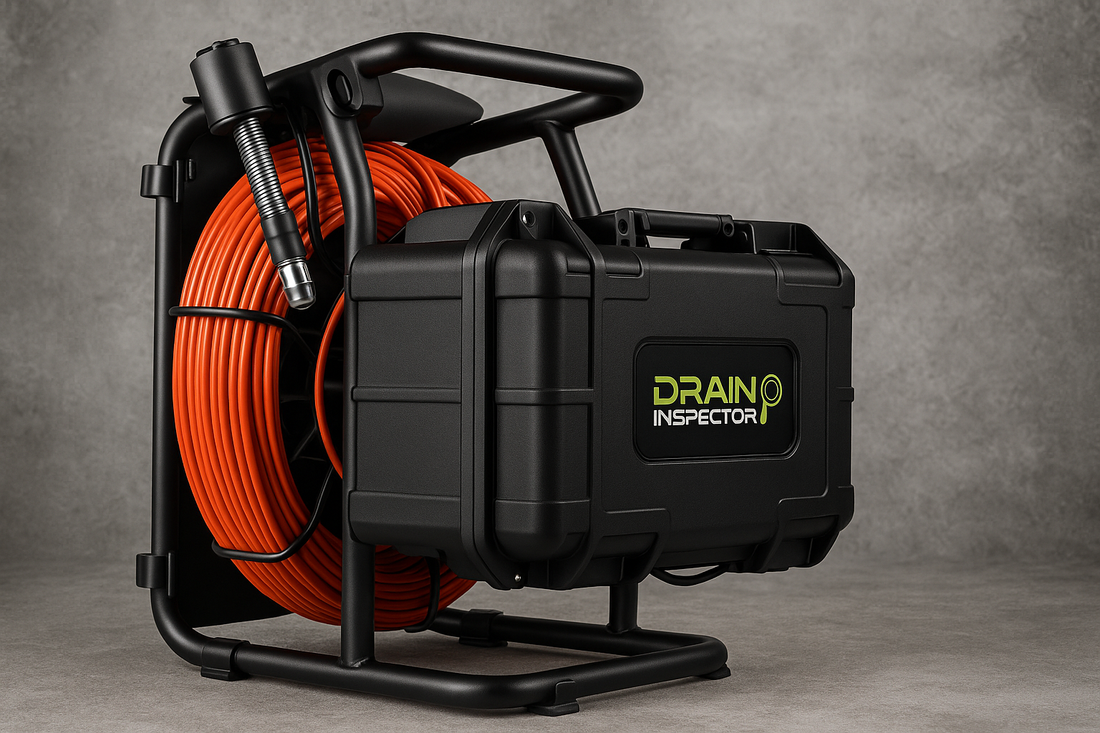
Types of Drain Cameras
Push-rod camera systems are the industry standard for service work in 1½" to 8-inch residential and commercial pipes. For larger municipal sewer mains, remote-controlled "crawler" systems exist — you may have noticed city crews running inspections from manhole to manhole. Those crawlers also handle stormwater pipes and bigger industrial lines. However, in this guide, we're focused on the compact push-rod camera systems designed for plumbers and drain/sewer rooter professionals doing everyday inspections and quick-checks on smaller sewers and drains.
Key Specifications That Matter
Here's a quick-reference breakdown of the most important specs to consider:
| Component | Features & Why They Matter |
|---|---|
| Camera Head & Optics | Available in multiple sizes to match your pipe diameters; self-leveling keeps the image oriented correctly; bright LEDs illuminate the interior; a rugged body and lens cover shield the internals. |
| Push Rod & Reel | Cable length and stiffness determine how far and through how many bends you can push; flexibility helps navigate elbows and turns; many include an encoder for footage counting. |
| Sonde (Beacon) | Standard 512 Hz signal allows a locator tool to receive the camera's position and map underground defects accurately. |
| Control Unit & Recording | Features a bright color screen on some models, or wireless broadcasting to your device; often includes footage-display, simple video/photo storage, and text or voice annotation for customer documentation. |
| Durability & Serviceability | IP-rated construction; replaceable parts including cable-repair "re-termination" kits are essential for long-term use and serviceability. |
| Power & Portability | Battery and/or 115V plug-in options; systems range from hand-carry units to cart-mounted setups with wheels for easy transport. |
| Operating Costs | Minimal ongoing expense, with daily payoff as both a job-selling and job-efficiency tool. |
How to Operate a Drain Inspection Camera
Prepare your camera and confirm you have proper pipe access — whether through a drain cleanout, sewer cap, or toilet-flange opening.
Start recording and/or enable Wi-Fi output, enter date/time/job identifiers if desired, and zero out the distance counter.
Slowly feed the camera and push rod into the pipe, navigating through bends carefully. Never force through hard obstructions — a camera is not a cleaning tool.
Record your findings with screenshots, annotations, and voice memos for clear documentation.
If needed, use a locator to pick up the sonde signal and mark the problem's exact location and depth from above ground.
Complete the cleaning or repair, then record your proof of success with the camera.
Save and back up all footage for the customer's records and your own archives.
Buying Guide: Matching the Camera to Your Needs
Classic Push-Camera Systems (3–6" lines, occasional 8+ inch)
Self-leveling camera head with spring leader, 150–300 ft. push rod/cable, Wi-Fi sharing, 512 Hz sonde for locating. Often battery-powered or AC/DC capable, some with on-screen job notation and additional optional features.
Micro Drain-Camera Systems (1½–3" lines, occasional 4-inch)
Smaller camera head designed to lead through tight turns, 75–150 ft. of thinner, more flexible push rod/cable. Frequently battery-powered with Wi-Fi sharing options and a 512 Hz sonde for locating.
Municipal/Industrial Push or Crawler Systems
Stiffer, thicker cable for pushing through longer and larger pipes. Larger head with stronger LEDs and optional centralizers to elevate the camera above sewage flow. High-end "crawler" systems feature pan-tilt-zoom, 500–1000+ ft. cable capacity, and job-reporting software.
Budget vs. Professional Tiers
Lower-cost models may sacrifice durability and omit features like footage counters or self-leveling views. Professional-grade units pay for themselves through dependability, serviceability, and a richer feature set.
Before making a purchase, think carefully about the pipe sizes and lengths you typically encounter, the features that will boost your on-site efficiency, and whether customer-facing presentation matters for how you close jobs.
ROI & Cost of Ownership
A sewer and drain inspection camera is a meaningful investment, but one that pays for itself remarkably fast:
Inspecting before and after every job means fewer callbacks and greater profit margins.
Showing visual proof with your estimates leads to significantly higher close rates.
Proper maintenance extends equipment life, lowering your annual cost of ownership.
Pairing with a locator receiver lets you map camera-head position and depth — invaluable for selling and planning trenchless repairs, adding professional capabilities with less guesswork and more profit potential.
Many plumbers and sewer/drain professionals recoup their investment after just a handful of diagnostic calls, often within the first 30 days. Pro Tip: never use the camera head as a tool to break through blockages!
Maintenance for Longer Camera Life
After every use, thoroughly clean and dry the camera head using an anti-fog solution. Check connectors, seals, and strain reliefs for signs of wear. Swap out scratched lens covers and worn O-rings promptly. Always store the system in a dry, protective case. Maintain battery health by keeping spare batteries and a charger on hand to avoid any downtime. It's smart to carry essentials like cleaning wipes, spare parts, and cable-repair kits in the field. Having an extra camera head available can save you from costly job delays as well.
Our technicians at Backyard Provider have worked on countless plumbing cameras over the years and can confirm firsthand that simple, consistent cleaning habits dramatically extend the service life of your equipment.
Troubleshooting: When the Camera Gives You Trouble
Blurry image: Clean the lens or replace the cover.
Dim LEDs: Verify light-control settings or check internal wiring.
Erratic counter: Inspect the encoder on the cable reel.
No video feed: Test all connections and check fuses.
Water inside the unit: Stop immediately and send it in for professional service.
If issues continue, don't get bogged down with warranty paperwork or manufacturer approvals — reach out to us directly. We also provide expert equipment repairs, maintenance, and servicing to keep your gear running at peak performance.
See More, Guess Less
A plumbing inspection camera gives you the answers that guessing never will. From selecting the right unit to maintaining it for years of reliable performance, this guide is designed to help you get maximum value from your investment.
With decades of combined field and shop experience, the Backyard Provider team has helped plumbers across the country pair the right drain cameras with the right jetters and complementary tools — ensuring they solve problems efficiently and profitably. Our access to parts, service, and strong relationships with leading manufacturers means your investment stays compatible and supported for the long haul.
Ready to find the right sewer inspection camera for your work? Get in touch with a Backyard Provider specialist and we'll match the ideal system to your jobs and budget.
Frequently Asked Questions
What camera head size do I need for 3–4 inch pipes?
A camera head around 1½" O.D. will fit and maneuver well, with enough LED output to illuminate pipes up to 6 inches. Smaller camera systems are also available for 2-inch lines and below.
What types of problems can a pipe inspection camera detect?
Root intrusions, cracks, pipe offsets, debris accumulations, grease buildup, and collapses. These visual findings become the foundation for your repair recommendations.
How deep can a sewer camera locate problems underground?
The sonde in most push-rod systems transmits a beacon detectable at depths of 10–15 ft. using a locator. Larger optional sondes can be tracked even deeper, depending on soil and pipe conditions.
Can I use a sewer camera without a locator?
Absolutely, but you won't be able to pinpoint where problems sit from above ground. Depth and positional data are extremely valuable when creating detailed inspection reports.
Is a drain inspection camera worth it for residential plumbers?
Without question. Even a mid-tier system can pay for itself rapidly through reduced guesswork and greater customer confidence. Many professionals recover their investment within 90 days of ownership.