

In theory, cutting paper seems straightforward — a blade comes down, material is held in place, and a clean cut results. In practice, however, achieving consistent, accurate cuts on a commercial paper cutter is a nuanced process. Misalignments, worn components, and improper pressure settings can all lead to inaccurate cuts, wasted material, and in serious cases, reprinting entire print runs. That's a cost no operation can afford to absorb lightly.
This guide walks through the most common problems encountered when operating a heavy-duty paper cutter, what causes them, and the practical steps you can take to resolve them and prevent recurrence.
Step One: Getting Accurate Cuts Starts with Setup
Measurement Display Accuracy
All industrial paper cutters include a system for displaying the exact position of the backgauge. On more advanced machines, this is a digital computer display. The very first step in preventing cut inaccuracies is confirming that the display is reading correctly. The ability to recalibrate is a built-in feature on most production machines and is considered standard practice. Check that the displayed size matches the actual measured size of each cut sheet, and make any necessary adjustments per the manufacturer's instructions.
Squareness of the Backgauge
A backgauge that isn't perfectly parallel to the knife will produce sheets that are not square, no matter how precise your measurements are. Each paper cutter manufacturer provides a specific procedure for checking and adjusting backgauge squareness. A simple test tool is available for this check — it compares the two back corners of the backgauge simultaneously. If there is a measurable difference between the two points, a mechanical adjustment is required following that machine's established procedure.
Eliminating Parallelograms & Squaring Sheets
Sheets of paper and other stock that are not properly squared with 90-degree corners are called parallelograms — four-sided objects where the corners are not true right angles. This creates serious downstream issues, as content placed on the sheet will not align correctly relative to the knife, and subsequent cuts will compound the error. Parallelograms can cause significant waste when running sheets through any machine where edge alignment is critical.
How to Square Your Sheets on the Paper Cutter
On a heavy-duty paper cutter, squaring sheets is straightforward. Avoid the temptation of trying to hand-force square corners — it rarely works. Instead, allow the machine to do the work:
- Place the pile loosely against the side guide and backgauge, allowing the paper to settle naturally without forcing alignment.
- The gripper edge — the front edge of the stack — should be positioned against the front guides of the machine.
- The right-side guide should be placed against the side gauge only, not pressed against both panels simultaneously, to avoid introducing additional skew.
- Use the side guide to trim and produce a clean 90-degree reference edge, then use that reference edge to complete the remaining cuts accurately.
Internal vs. External Register Explained
When cutting pre-printed sheets, the concept of register becomes essential. Register refers to the relationship between the position of printed elements and the edges of the cut sheet. Getting this right means the difference between a professional finished product and one that has uneven margins or cut-off content.
Internal Register
Internal register is the position of the images relative to one another across the sheet. This measures whether elements on a printed sheet are positioned accurately in relation to each other — regardless of where the sheet edges fall. Maintaining internal register ensures multi-element layouts remain cohesive even after trimming.
External Register
External register refers to the alignment of the printed images relative to the final sheet edges after cutting. This is where the cutting process directly impacts the visual outcome. Poor external register results in margins that are inconsistent — wide on one side, narrow or missing on the other. In complex cutting programs, even small external register errors may require you to reduce margins or trim additional material to correct the issue.
Today's modern heavy-duty cutters offer programmable cutting sequences with stored job memory. It's more important than ever to periodically verify both internal and external register as sheet stock, humidity, and clamp pressure can all influence final cut position — even on a well-calibrated machine.
Clamp Pressure: The Critical Setting
To achieve maximum productivity, clamp pressure settings are among the most important variables to manage. The foundational rule: use the highest clamp pressure appropriate for the material without causing compression damage, dislocation, or sheet drag.
The clamp pressure setting should never be higher than necessary — over-clamping can distort soft materials, cause the bottom sheets to shift, and in some cases, create inaccuracies that build up over a run. Manufacturers of major paper cutter brands provide reference charts for recommended clamp pressure settings based on material type. Always consult these before starting a new job on unfamiliar stock.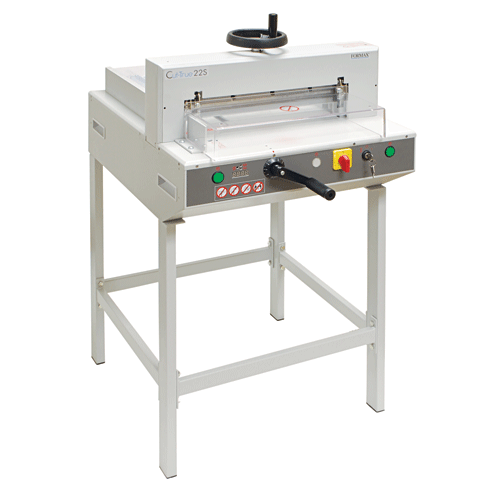
Key Clamp Pressure Principles
- Use the highest pressure that still allows sheets to settle properly — not so high that it compresses or displaces material.
- Consult manufacturer guidelines for pressure recommendations specific to your material type and weight.
- If sheets are dragging backward or forward under the clamp, check pressure, knife angle, and backgauge position simultaneously.
- Pressure adjustments may need to be revisited as the job progresses and pile height changes, particularly with soft or coated stocks.
Common Paper Cutting Problems & How to Fix Them
The table below covers the most frequently encountered cutting faults, their likely causes, and recommended corrective actions. Use this as a quick-reference diagnostic tool when issues arise mid-run.
| Condition | Possible Cause | Possible Remedies |
|---|---|---|
| Overcut: Knife moves forward as it passes through the pile | Knife angle too acute; clamp pressure too low | Reduce clamp pressure; exchange knife for correct angle |
| Undercut: Knife moves backward as it passes through the pile; bottom sheets become shorter | Knife angle too blunt; insufficient initial clamping | Increase clamp pressure; exchange knife; check adequacy of initial clamping |
| Mushroom cut: First sheets are cut too wide at the top of the pile, which is correct, then the pile narrows | Knife cuts with too much material; blade too large | Guide pins may need adjustment — consult a specialist |
| Bow or Hollow cut: Material is uneven; sheets are too short in places | Thickness of stock too great or cases of large differences in material | No flexible blade clamp: cut in cases of large differences; use flexible blade clamp if available |
Keeping Your Knife Sharp & Properly Positioned
One of the most overlooked contributors to cutting problems is blade condition. A dull or improperly angled knife introduces drag, uneven pressure across the pile, and increased clamp force requirements — all of which lead to inaccurate results. Regularly inspect and replace the knife as part of standard preventive maintenance.
When a knife is exchanged or reground, confirm that the blade's cutting angle matches the manufacturer's specification for the material type being processed. The incorrect grind angle is one of the leading causes of both overcut and undercut conditions. Additionally, ensure the knife is seated and locked correctly in the knife beam before operating — a loose knife is a safety hazard and a guaranteed source of cut inaccuracy.
Never attempt to adjust, seat, or exchange a knife without following the full lockout/tagout safety procedure outlined in your machine's operator manual. Knife-related injuries in paper cutting operations are serious and entirely preventable.
Ready to Upgrade Your Cutting Equipment?
The Formax Cut-True 15M Manual Guillotine Cutter delivers the precision, reliability, and build quality professional operations demand — designed to eliminate the cutting issues outlined in this guide.