

Miter cuts are among the most satisfying — and most misunderstood — cuts in carpentry. Get them right and your trim work looks crisp, professional, and seamless. Get them wrong and the gaps tell the story. This guide walks you through the fundamentals and the fine points.
Whether you're running crown molding along a cathedral ceiling, fitting baseboard around an out-of-square room, or assembling a picture frame, miter angles govern the outcome. A miter saw is your most important tool for this work — but the saw is only as useful as your understanding of the geometry behind the cut.
Classic miter angle illustration — the foundation of every trim joint.
What Is a Miter Angle?
A miter angle is the angle at which you set your saw to cut across the face of a workpiece. The most familiar miter angle is 45°, the standard cut for a 90° corner — two pieces meeting at 45° each produce a perfect right-angle joint. But the real world rarely hands you perfect 90° corners, and real crown molding comes in spring angles that add an entirely new layer of math.
Understanding how miter angles relate to corner angles is the first step toward accurate, consistent work. The relationship is simple: to find the miter angle for any two-piece joint, divide the corner angle by two. A 90° corner needs a 45° miter. A 135° corner (a typical bay window angle) needs a 67.5° miter. Simple in theory; demanding in practice.
Flat Miter
The saw blade tilts left or right while the workpiece lies flat on the table. Used for baseboards, picture frames, and door casings lying flat.
Bevel Cut
The blade tilts away from vertical while the workpiece stands upright against the fence. Used for angled surfaces and compound work.
Compound Miter
Both a miter angle and a bevel angle are set simultaneously. Essential for crown molding and sloped-ceiling trim work.
Spring Angle
The angle at which crown molding sits against the wall and ceiling. Common spring angles are 38° and 45°. Knowing this angle unlocks your compound cut settings.
Diagram showing flat miter vs. compound miter cut geometry.
Using a Miter Saw Correctly
A miter saw — sometimes called a chop saw — is purpose-built for angled crosscuts. Modern compound miter saws can pivot both left and right and tilt the blade for bevel cuts. Sliding compound miter saws extend that range further, allowing wider boards to be cut cleanly in a single pass.
Pro Tip: Always make a test cut on a scrap piece before committing to finish material. Set the angle, make the cut, then hold the two scrap pieces together to verify the joint before touching your good lumber.
Setting Your Miter Angle
-
Measure the corner angle with a digital angle finder or sliding bevel gauge. Do not assume any corner is exactly 90° — walls shift and settle over time.
-
Divide the corner angle by two to find the miter setting for each piece. Write it down. Small errors cascade quickly when you're fitting an entire room.
-
Dial the miter saw to that setting, using the detent if the angle is a standard one, or bypassing the detent for odd angles. Lock the bevel and miter adjustments firmly before cutting.
-
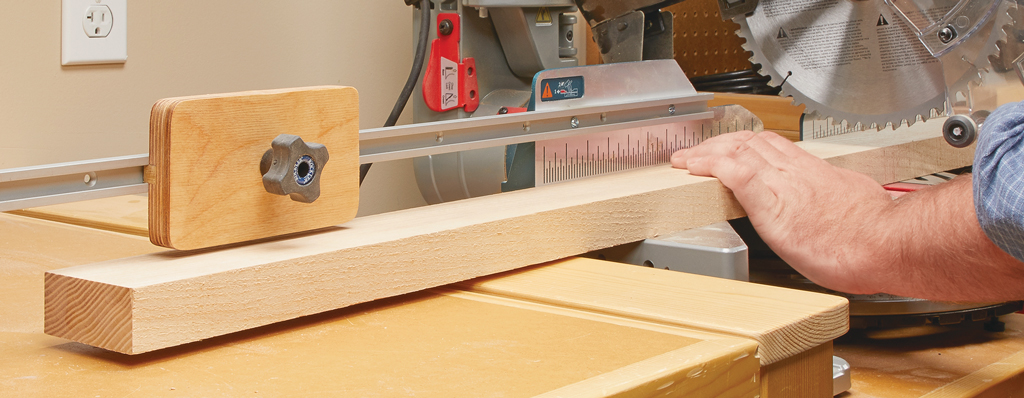
Position the workpiece against the fence with consistent, firm pressure. Hold it in place or clamp it — movement during the cut destroys the joint.
-
Let the blade reach full speed before lowering it into the material. Follow through the cut completely before raising the blade.

Crown Molding & Spring Angles
Crown molding is the most challenging miter work in finish carpentry — and the most rewarding when it comes together. The difficulty stems from the spring angle: crown doesn't lie flat; it leans against both the wall and the ceiling at a fixed angle, which means a simple flat miter is not enough. You need a compound cut.
There are two methods for cutting crown on a miter saw. The traditional method nests the crown against the fence at its spring angle, effectively holding it in the same position it will occupy on the wall and ceiling. The compound method lays the crown flat on the saw table and dials in both a miter angle and a bevel angle calculated from the spring angle. Both methods work — choose the one that suits your saw and your comfort level.
Nested Crown Method: Rest the crown molding upside-down against the fence of the saw with the ceiling edge flat on the table and the wall edge tight to the fence. With the crown held this way, a simple miter setting — without any bevel — produces a correct compound cut. The fence acts as the ceiling; the table acts as the wall.
Flat Crown Method: Lay the crown flat on the saw table. Using a compound miter chart (based on the spring angle and the corner angle), set both a miter angle and a bevel angle. This method is preferred on jobsites where a sliding saw with limited fence height is used.
Common Miter Angle Reference
The table below covers the most frequently encountered corner angles in residential carpentry and the corresponding miter settings for each piece of a two-piece joint. For crown molding compound cuts, consult a dedicated compound miter chart based on your specific spring angle.
| Corner Angle | Miter Setting (each piece) | Common Use |
|---|---|---|
| 90° | 45° | Standard room corners, picture frames |
| 135° | 22.5° | Octagonal openings, bay windows |
| 120° | 30° | Hexagonal forms, some bay configurations |
| 67.5° | 33.75° | Acute room corners |
| Variable | Corner ÷ 2 | Any non-standard angle |
Out-of-Square Corners & Coped Joints
In an ideal world, every inside corner would be a perfect 90° and every wall would be plumb. In reality, walls rack, settle, and drift. Out-of-square corners are the norm on any older construction. Rather than fighting this with increasingly fine miter adjustments, experienced carpenters switch to coped joints for inside corners — a technique where one piece of molding is profiled to overlap the face of the adjoining piece. Coped joints close up as the building moves; miter joints open.
- Run the first piece of baseboard or crown tight into the corner as a butt cut.
- Cut the joining piece at 45° to reveal the profile of the molding.
- Use a coping saw or oscillating tool to follow the revealed profile exactly.
- Test-fit and shave back with a rasp or file until the joint closes cleanly.
- Nail, fill, and finish as normal — the joint will hold even as the structure moves.
Choosing the Right Miter Saw for the Work
Not all miter saws are created equal. A basic single-bevel compound saw handles most trim and framing work. A dual-bevel saw lets you flip bevel direction without physically flipping the workpiece — a significant time-saver for crown molding. A sliding compound miter saw adds crosscut capacity, making it possible to cut wide stock cleanly.
For heavy-duty applications — cutting metal framing, structural steel, aluminum extrusions, and hardened fasteners — a dedicated metal-cutting chop saw is the right tool. These machines run at lower RPM than wood-cutting saws and use abrasive or carbide-tipped blades designed to shed heat and manage sparks safely. Using a wood-cutting saw on metal is a serious safety hazard; the wrong blade type will shatter, kick, or throw material dangerously.
Safety First: Always wear eye protection, hearing protection, and heavy gloves when operating a miter saw — especially a metal-cutting chop saw. Secure the workpiece with the integrated clamp. Never reach across the blade path or remove cut-offs while the blade is in motion.
Getting the Cleanest Cuts
Even a perfectly set miter angle means nothing if the cut itself is rough, torn, or burned. Blade quality and blade condition are the primary variables in cut quality. A sharp, appropriate blade produces a glassy, paint-ready surface. A dull or incorrect blade tears fibers, leaves mill marks, and forces extra sanding.
- Use a high tooth-count blade (60–80 teeth) for finish trim work in hardwood and softwood.
- Never force the saw — let the blade do the work at its own pace.
- Keep the fence and table clean of sawdust; debris lifts the workpiece and skews the cut.
- Check fence and table squareness with a reliable square before starting any precision work session.
- Use a stop block clamped to the fence when cutting multiple pieces to the same length — accuracy and speed increase simultaneously.
- Score a pencil line first and align the blade's kerf to the waste side of the line.
Blade Kerf Matters: Every blade removes material equal to its kerf width — typically 0.083" to 0.125". When fitting trim or building a frame, account for kerf by marking the cut line clearly and cutting on the waste side. Even a fraction of an inch lost to kerf accumulates across a large project.
The Right Tool Makes All the Difference
Whether you're a finish carpenter running miles of crown or a homeowner tackling a single room of baseboard, the quality of your miter saw determines how much time you spend fighting your cuts and how much time you spend enjoying the results. Invest in a capable machine, learn to set and verify your angles, and the work will show it.
For demanding jobsite work that crosses between wood framing and metal cutting, a heavy-duty chop saw purpose-built for both materials is the most versatile choice you can make. One machine, correctly spec'd, handles structural steel, aluminum, and hardwood — saving you setup time, floor space, and money.
Equip your workshop with tools built for the demands of professional carpentry and construction.
Shop the Evolution S355MCS