

Picking up a grain mill may feel like a major step, but it's an investment that rewards you many times over. Store-bought milled grain begins losing its edge within weeks, while whole, unmilled grain will hold its quality for months when kept in the right conditions. Buying grain in bulk and running it through your own mill as needed trims your homebrew budget significantly, and hands you full control over exactly what ends up in every batch of beer.
Before diving in, here's what you'll want to know about milling grain at home.
How It Works
Grain mills rely on two or three metal rollers mounted parallel inside a sturdy frame. The spacing between those rollers is tight enough that no grain slips through uncrushed, and adjustable enough to let you dial in a coarser or finer grind depending on what your recipe calls for.
For an efficient mash, your grain has to be physically split open and reduced to a coarse meal known as grist. The goal is a grist that's thoroughly cracked but nowhere near flour-fine, because overly fine grain makes it hard to separate the solids from the wort once the mash is done.
In an ideal crush, each kernel breaks into enough pieces that the interior starches can fully convert during the mash, while the husks remain as whole as possible. Those intact husks matter because they cushion the crushed starchy bits inside and form a filter bed that lets liquid flow freely through the mash.
If you're only running partial mashes with a handful of pounds, or simply steeping specialty grains to round out flavor, aroma, and color, crush quality is a minor concern. Full all-grain brewing is a different story — trying to work with ten pounds of grain that won't drain properly can bring a brew day to a halt. This is why some commercial breweries toss oat or rice hulls into their mash to keep the grain bed light and airy.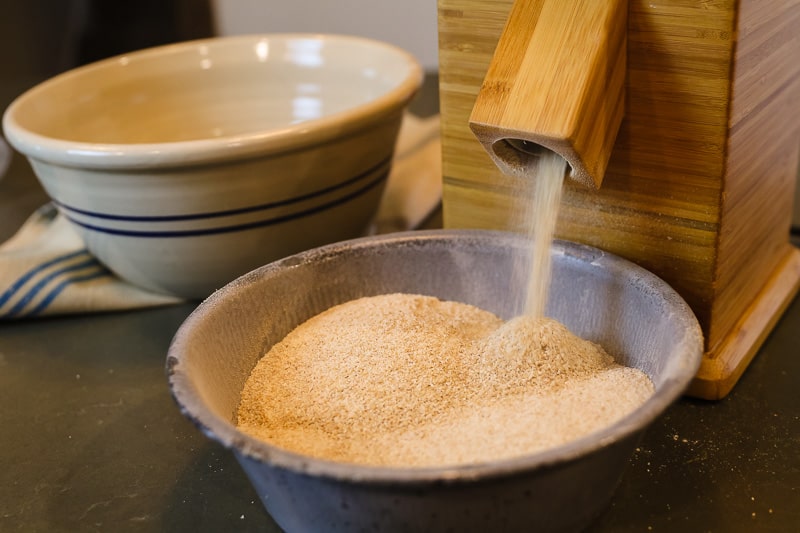
Choosing The Right Mill
Aim for a grain mill that handles your grain with a gentle touch. When professional-scale mills get shrunk down for homebrew use, they can lose some of their ability to draw grain in smoothly and crush it in progressive stages. Skip any homebrew mill that pulverizes grain too aggressively.
Other details worth weighing when shopping for a homebrew mill: roller diameter, the materials the rollers and bearings are made from, and total hopper capacity. If you're planning to mill larger volumes, look for a model with a bigger hopper — some can hold as much as eleven pounds at a time, which saves you from stopping to refill mid-job.
As demand for homebrew mills has grown, the market has expanded into a wide range of designs. The two-roller format is the most common, but you'll also run across Victoria-style mills, single roller mills, and multi-roller setups. The Victoria (or Corona) mill uses two rotating plates to grind the grain and is usually the cheapest option, though it tends to shred the husk since it's really built for milling flour. Single roller designs pair one roller with a flat, fixed plate and produce a better crush, but still bruise the husk noticeably. Two-roller mills remain the sweet spot for homebrewers, because they do an excellent job crushing the grain's interior while leaving the husks largely intact when set up correctly.
Motorize The Mill
 After cranking through a few big batches by hand, most brewers start looking for a way to let a motor do the heavy lifting. Any drill with a 3/8" chuck can usually handle the conversion — pop off the hand crank, slip a drill onto the drive roller axle, and you're set. That said, a few extra considerations will save you from damaging your mill or hurting yourself.
The key thing to keep in mind is that malt sometimes hides small stones and other debris. When one of those makes it into the rollers, either the stone crushes, part of the mill gives out, or the whole thing stalls. In heavy industrial equipment, rotating parts are usually keyed to their shafts with a soft metal pin designed to shear if the shaft locks up, letting the motor keep turning rather than destroying the machine.
If your drive roller has a smooth cylindrical shaft, you can fake a similar safeguard by wrapping a strip of paper around the shaft before seating it in the drill chuck. Tighten the chuck by hand only — never with a wrench — just firmly enough that the mill will still turn under a full grain load. If something binds up, the chuck will slip on the shaft instead of breaking anything. This trick only works on round shafts, though; hexagonal shafts or shafts with flat spots won't cooperate.
Ready to Motorize Your Mill?
Skip the guesswork with a purpose-built kit designed to take the strain off your arm and deliver a consistent crush every time.
Country Living Motorization KitSafety First!
Once you start adding motors, electrical current, and power tools into your brewing routine, safety has to sit at the top of your priority list. A motorized mill left plugged in at bucket height is a real hazard, and loose fingers or loose clothing can be grabbed by gear-driven parts in a heartbeat. Pay especially close attention whenever your motorized mill is operating anywhere near water.
Torque Awareness
Electric drills vary widely in the torque they deliver, and some heavy-duty industrial models pack enough punch to cause a serious injury if the drill stops suddenly. Always keep a firm, deliberate grip anytime you're running a handheld drill on your grain mill.
Dust Control
Milling a lot of grain under power creates a heavy cloud of grain dust. Beyond the risk of contaminating your beer, fine grain dust is genuinely explosive in the right concentration. Ventilate the milling area well and keep any sparks or open flames far away.
Machine Handling
Never leave a plugged-in motorized mill sitting unattended at a height where it could catch clothing or skin. Unplug between batches, and keep drinks, pets, and loose items well clear of the feed area while milling.
Milling Your Own Grain
When you set up your mill, position it as far as practical from wherever you'll be chilling and fermenting your wort. Grain dust is loaded with bacteria that can quickly contaminate finished beer. The mill itself should be mounted somewhere convenient — typically sitting on top of a sturdy plastic bucket or clamped firmly to a workbench. A rock-solid setup that frees up one hand is what you're after.
If you're buying grain in enough volume to cover several batches and milling only what you need for each brew day, a quality scale at home becomes a must. Another approach is to repurpose empty coffee cans as volume measures for your larger grain bills — weigh the can full, mark the capacity on the side, and go by volume from then on. Keep in mind that grain weight changes with moisture content, so measuring by volume actually helps you keep the grain quantity more consistent batch to batch.
Once you've weighed out what you need, pour the grain into the hopper and fire up your motor or grab the crank. Start slowly to let the grain begin flowing through the rollers, then gradually bring the mill up to full speed. Try to mill only what you plan to use right away. Like coffee beans, grain stays fresher longer when it hasn't been milled yet. Anything left over after your brew session should get sealed tightly in a large plastic food-storage bucket until the next brew day.
Once you've experienced the savings and control that come from buying grain in bulk and milling it yourself, you'll wonder how you ever brewed any other way.
Country Living Motorization Kit