

A complete step-by-step guide to transforming a standard fridge or freezer into the perfect temperature-controlled environment for homebrewing.
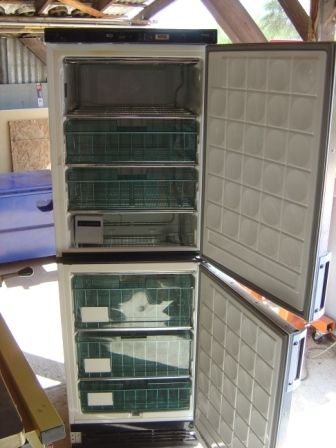
Every dedicated homebrewer eventually reaches a point where controlling fermentation temperature becomes essential. The flavors, clarity, and consistency of your beer depend heavily on maintaining a stable environment during the fermentation process. The simplest and most affordable solution? Repurposing an old refrigerator or chest freezer into a dedicated fermentation chamber.
A fermentation chamber gives you the ability to dial in precise temperatures for ales, lagers, and everything in between. Whether you want to hold a steady 65°F for a clean ale fermentation or drop down to 50°F for a traditional lager, this project puts you in full control. The best part is that it requires very little technical skill and can be completed over a single weekend with readily available materials.
In this guide, we will walk through every step of the conversion process — from selecting and preparing the right refrigerator to installing a temperature controller and getting your first batch fermenting at the ideal temperature.
Finding the Right Fridge or Freezer
The first order of business is sourcing a refrigerator or freezer that will serve as the foundation of your fermentation chamber. Either a full-size upright fridge or a chest freezer can work well for this purpose. The choice largely comes down to how much space you need and what is available to you.
A standard refrigerator is an excellent option because it already has shelving and a convenient upright form factor. You can easily fit a couple of carboys or fermentation buckets inside without much modification. Chest freezers, on the other hand, tend to offer more raw interior volume and better energy efficiency, but accessing your fermenters means reaching down into the unit rather than pulling them out at waist height.
Check online marketplaces, garage sales, and classified listings for used units. You do not need anything fancy — even a fridge with cosmetic damage or a broken thermostat will work just fine since you will be bypassing the built-in temperature controls anyway. Just make sure the compressor runs and the unit actually cools. It is also worth verifying that your fermenters will physically fit inside before committing to a particular unit.
★ Pro Tip
Measure the interior dimensions carefully and compare them against your carboys or fermentation buckets. Account for any internal shelving brackets or humps from the compressor that could reduce usable space.
Cleaning and Prepping the Interior
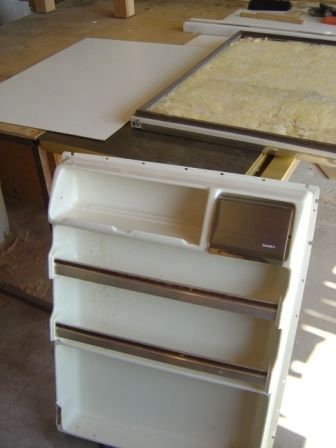
Once you have your fridge or freezer secured, the next step is giving the interior a thorough cleaning. Used appliances often come with lingering odors, stains, or residue from their previous life, and you want a fresh, sanitary environment for your brewing operation.
Start by removing all shelves, drawers, and any loose components. Wash everything down with a solution of warm water and baking soda, which is excellent at neutralizing stubborn smells. For particularly grimy interiors, a mild bleach solution can help sanitize the surfaces. Scrub all walls, the floor of the compartment, and the rubber door gasket where mold and mildew tend to hide.
Allow the unit to dry completely with the door open before moving on. If any persistent odors remain, placing an open box of baking soda or a bowl of activated charcoal inside for a day or two usually takes care of it. A clean starting point ensures that nothing compromises the flavor or quality of your beer down the road.
Adjusting or Removing the Shelf
Most refrigerators come with multiple shelves that were designed for storing food items of various sizes. When converting the unit for fermentation, you will likely need to reconfigure or remove some of these shelves to accommodate your brewing vessels.
Carboys, fermentation buckets, and conical fermenters tend to be tall and need generous vertical clearance. Pull out any shelves that obstruct the space and keep only what you need. If you are fermenting multiple smaller batches simultaneously, a single repositioned shelf can create a convenient two-tier setup.
For chest freezers, the interior is typically one open compartment, so shelf management is less of a concern. However, you might consider building or purchasing a simple wire rack or wooden collar to help organize the space and keep fermenters upright and stable.
Managing the Drip Tray and Drainage
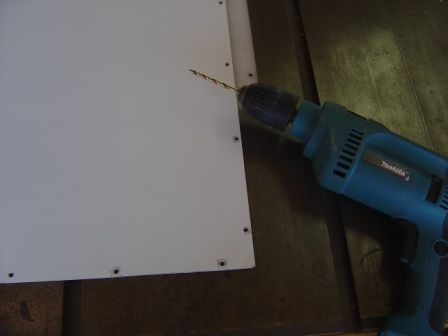
Refrigerators generate condensation as part of their normal cooling cycle, and this moisture needs somewhere to go. Most units have a built-in drip tray or drainage channel that directs water to an evaporation pan near the compressor. When you repurpose the fridge as a fermentation chamber, you need to make sure this system is still functioning properly.
Check the drain hole at the back or bottom of the interior compartment and make sure it is clear of debris. If it is clogged, a pipe cleaner or thin wire can usually clear the blockage. A functioning drain prevents water from pooling at the bottom of the fridge where it could come into contact with your fermenters or create an environment for mold growth.
Placing a small towel or absorbent mat at the bottom of the unit can serve as an extra layer of protection against any minor condensation buildup, keeping the interior clean and dry between batches.
Installing the New Cool Panel
Depending on the condition and configuration of your fridge, you may want to modify or upgrade the internal cooling panel to optimize airflow and temperature distribution within the chamber. In some older refrigerators, the cooling element or evaporator plate is positioned in a way that creates uneven cold zones.
If you find that one area of the fridge is significantly colder than another, consider adding a small battery-powered or USB fan inside the unit to circulate air more evenly. This is a simple and inexpensive upgrade that makes a noticeable difference in maintaining consistent temperatures across all your fermenters.
For those using a chest freezer, the cooling coils are typically embedded in the walls, which provides more uniform cooling. However, the same fan trick applies if you notice temperature stratification between the top and bottom of the chest cavity. A gentle circulation of air inside the sealed compartment goes a long way toward even fermentation conditions.
Adding a Temperature Controller
This is arguably the most critical step in the entire conversion process. A dedicated temperature controller is what transforms an ordinary refrigerator into a precision fermentation instrument. Without one, the built-in thermostat of most fridges simply cannot maintain the narrow temperature range that quality fermentation demands.
External temperature controllers such as the Inkbird or Johnson Controls models are popular choices among homebrewers. These devices work by plugging the refrigerator into the controller, which then uses a temperature probe placed inside the chamber to monitor conditions. When the temperature rises above your set point, the controller powers the fridge on to cool things down. When it drops below the target, the compressor shuts off.
Some dual-stage controllers can also manage a heat source, which is invaluable during colder months when ambient temperatures might cause the chamber to drop too low. A simple reptile heating pad or a small ceramic space heater placed inside the fridge can serve as the warming element in a dual-stage setup.
To install, simply run the temperature probe through the door seal — the gasket is flexible enough to close around a thin wire without losing its seal. Position the probe so it reads the air temperature inside the chamber or, even better, tape it directly to the side of your fermenter with some insulation over it for the most accurate reading of your beer’s actual temperature.
★ Pro Tip
Taping the probe directly to the fermenter and covering it with a small piece of foam insulation gives you a far more accurate reading of the beer temperature compared to measuring ambient air temperature alone. This small step leads to noticeably better results.
Firing It Up — Your First Fermentation
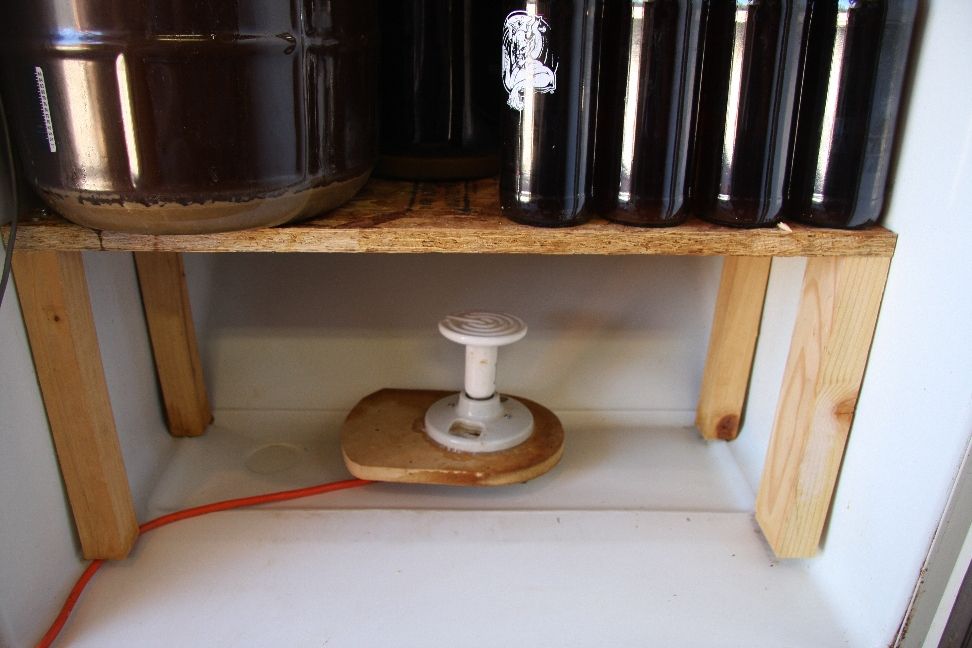
With everything cleaned, configured, and the temperature controller installed, it is time to put your new fermentation chamber to work. Before loading in a fresh batch of wort, run the empty chamber for 24 hours to verify that the controller is maintaining your desired temperature accurately. This dry run helps you identify and correct any issues before your beer is on the line.
Set the controller to your target fermentation temperature — typically around 64–68°F for most ale yeast strains or 48–55°F for lagers. Monitor the readings periodically throughout the day to confirm the temperature holds steady without significant fluctuations.
Once you are satisfied that the chamber is performing reliably, transfer your cooled wort into your fermenter, pitch your yeast, seal everything up, and place it inside the chamber. Close the door, set the controller, and let science do the rest. Over the coming days and weeks, your yeast will work at the precise temperature needed to produce clean, consistent, and delicious beer.
Congratulations — you now have a fully functional fermentation chamber that rivals setups costing many times more. This single upgrade will elevate the quality of every batch you brew going forward, giving you the control and consistency that separates good homebrew from truly great beer.
Recommended From Our Store
Ready to Upgrade Your Brewing Setup?
Whether you are building a fermentation chamber or looking for a dedicated refrigeration solution, a commercial-grade glass door merchandiser gives you visibility and professional temperature control.
Chef AAA TSM33R Glass Door Merchandiser RefrigeratorFinal Thoughts
Converting a refrigerator into a fermentation chamber is one of the most impactful upgrades a homebrewer can make. It is affordable, straightforward, and the improvement in beer quality is immediate and dramatic. Temperature control is the single biggest variable separating average homebrew from exceptional homebrew, and this project puts that variable entirely in your hands.
From finding the right unit and cleaning it out to installing a temperature controller and running your first batch, each step in this guide is designed to be approachable for brewers of all experience levels. So grab a fridge, gather your supplies, and take your homebrewing to the next level. Your taste buds will thank you.