

Insert Range Hoods at a Glance
These are ventilation units that mount inside a cabinet or custom-built hood structure, giving your kitchen a seamless, built-in aesthetic while efficiently clearing smoke, steam, and cooking odors.
Ducted vs. Ductless
A ducted insert pushes contaminated air outside your home and is the most effective option for eliminating heat, grease, and fumes. A ductless (recirculating) insert uses filters to clean the air and return it to the kitchen — ideal when exterior venting is not feasible. Just stay on top of filter maintenance.
How They Compare to Other Hoods
Insert hoods offer superior design flexibility since they are tucked away inside your cabinetry. Unlike wall-mount or island hoods that are visible focal points, inserts blend right in. They often rival the power of full-size hoods but do require a custom enclosure for mounting.
Installation Essentials
These hoods are fitted into a custom cabinet or dedicated range hood enclosure (typically lined to protect the cabinetry). Position them 24–36 inches above the cooktop and connect to proper ductwork or a recirculation kit. Stick with the manufacturer's recommended duct size (commonly 6 inches or larger) and keep vent runs as straight and short as possible.
Sizing & CFM
Your insert hood should be at least as wide as your cooktop (a 36-inch stove typically calls for a 36–42 inch hood). For airflow, plan on approximately 100 CFM for every linear foot of cooking surface — bump that up if you do a lot of high-heat or gas cooking. A 36-inch range generally needs between 350 and 600 CFM.
Quiet Performance & Lighting
Many insert range hoods come equipped with multi-speed fans and whisper-quiet operation (some rated as low as 2 sones at their lowest setting). Integrated LED task lighting illuminates your cooking area clearly. Premium models may use remote blowers to push noise even further away from the kitchen.
Filters & Upkeep
Insert hoods generally use baffle or mesh grease filters, many of which are dishwasher-friendly. Ductless models add charcoal filters to neutralize odors. Keep your metal filters clean on a monthly basis and swap out charcoal filters on schedule to maintain peak airflow and keep your kitchen smelling fresh.
What Exactly Is an Insert Range Hood?
An insert range hood is a ventilation component specifically engineered to be installed inside custom cabinetry, a wooden or metal hood surround, or a specially built enclosure above your cooking area. Unlike standalone hoods that hang visibly from the ceiling or mount against the wall, an insert is designed to be completely concealed — only the bottom face (with the filters and lights) is visible when you look up from the stovetop.
These units are sometimes marketed as "range hood inserts," "hood liners," or "power packs." Regardless of the name, the idea is the same: you get commercial-grade suction power packaged in a compact unit that slides into your custom setup. This makes them an outstanding choice for homeowners and designers who want their ventilation to work hard without drawing attention to itself.
Insert hoods typically include the blower motor, grease filtration system, lighting, and fan controls — everything you need for ventilation, wrapped up in one installable unit. The surrounding cabinetry or enclosure provides the visual finish, giving you total control over the final look of your kitchen.

Ducted vs. Ductless Insert Range Hoods: Weighing the Pros & Cons
One of the first decisions you will face when selecting an insert range hood is whether to go with a ducted (vented) or ductless (recirculating) configuration. Each approach has distinct advantages, and the right choice depends on your kitchen's layout, your cooking habits, and your renovation constraints.
Ducted (Vented) Insert Hoods
Ducted inserts connect to ductwork that channels smoke, steam, heat, and grease-laden air completely out of the house through a wall or roof cap. This is widely considered the gold standard in kitchen ventilation because polluted air is physically removed from the space rather than filtered and recirculated.
Advantages: Superior air quality improvement, better moisture and heat removal, handles heavy-duty cooking with ease, no charcoal filters to replace.
Drawbacks: Requires ductwork installation (which can be costly or complex in some homes), not viable in every apartment or condo, and may involve structural modifications.
Ductless (Recirculating) Insert Hoods
Ductless inserts draw in cooking fumes, pass them through grease filters and then activated charcoal filters to capture odors and particles, and blow the cleaned air back into the kitchen. This setup is a practical solution for kitchens where running ductwork to the outside simply is not an option.
Advantages: Can be installed virtually anywhere without ductwork, often simpler and less expensive to set up, great for condos, apartments, and renovation projects with limited access to exterior walls.
Drawbacks: Less effective at removing heat and moisture since air stays indoors, charcoal filters need periodic replacement, and overall ventilation performance does not match ducted systems for intense cooking.
Insert Hoods vs. Wall-Mount Range Hoods
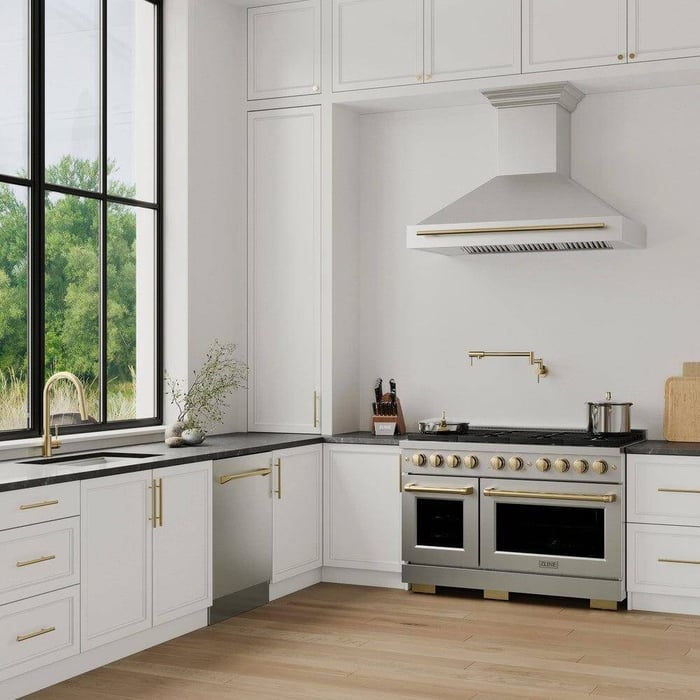
Wall-mount range hoods are among the most popular hood styles in modern kitchens. They attach directly to the wall above the cooktop and feature a visible chimney or canopy that becomes a design element in the room. Insert hoods, by contrast, hide within a custom enclosure, so the visual impact comes entirely from your chosen cabinetry or surround — not the hood itself.
In terms of raw performance, many insert hoods are comparable to wall-mount models, offering similar CFM ratings and fan speeds. The key difference is aesthetic control. If you want a bold, statement-making hood that stands out, a wall-mount may be the way to go. If you prefer a kitchen where ventilation disappears into the architecture, an insert is the better fit.
Keep in mind that inserts require a bit more planning since you need to build or purchase the surrounding structure. Wall-mount hoods are essentially self-contained and ready to install once mounted.
Insert Hoods vs. Island Range Hoods
Island range hoods hang from the ceiling above a kitchen island cooktop and are engineered to vent effectively without the benefit of a nearby wall to help channel air. They are typically more visually imposing and can serve as a dramatic centerpiece in open-concept kitchens.
An insert hood, on the other hand, can also be adapted for island use if you build a custom enclosure suspended from the ceiling — though this is a more involved project. The tradeoff is that you gain complete design freedom with the insert approach, selecting whatever material, shape, and finish you want for the enclosure, while an island hood gives you a ready-made, factory-finished solution.
Island hoods typically require higher CFM ratings because they lack the natural air-channeling advantage of a wall behind them. If you are converting an insert for island use, factor in additional airflow needs.
Insert Hoods vs. Under-Cabinet Range Hoods
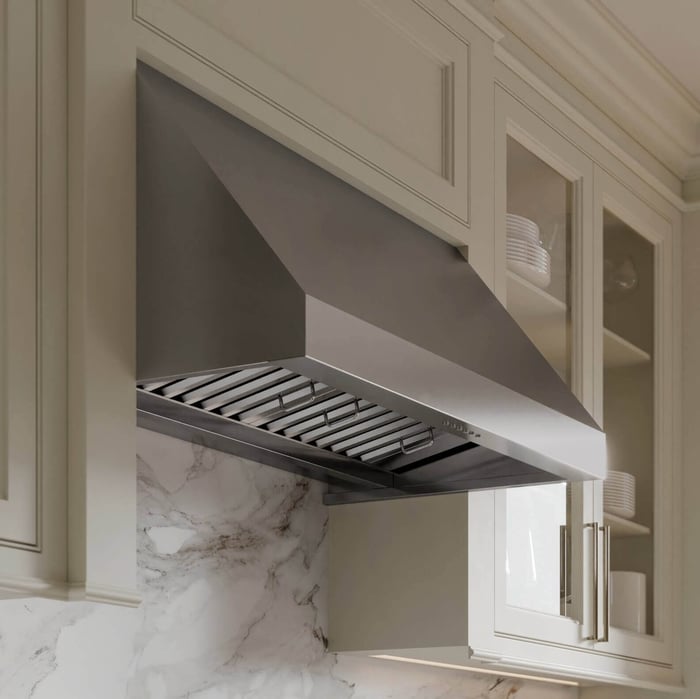
Under-cabinet range hoods mount directly to the underside of a kitchen cabinet above the stove. They are visible as a separate appliance beneath the cabinet and are one of the most common and budget-friendly ventilation solutions available.
Insert hoods can often deliver the same level of ventilation power as under-cabinet models, but with the added benefit of being concealed. Instead of seeing a stainless steel appliance beneath the cabinet, you see only the clean underside of a custom enclosure.
For homeowners prioritizing a high-end, integrated look, inserts are the clear winner. If budget and ease of installation are your primary concerns, an under-cabinet hood gets the job done with less custom work.
Installation Fundamentals: Placement & Setup
Proper installation is essential to getting the most out of your insert range hood. The unit sits inside a custom cabinet, wood or plaster hood surround, or a purpose-built metal enclosure. Most manufacturers recommend lining the interior with a non-combustible material to protect the surrounding cabinetry from heat damage over time.
The ideal mounting height is 24 to 36 inches above the cooking surface. Placing the hood too high reduces its ability to capture cooking fumes efficiently, while mounting it too low can create a fire hazard and make cooking uncomfortable.
For ducted configurations, connect the insert to rigid or semi-rigid ductwork using the recommended duct diameter — typically 6 inches or larger for residential kitchens. Aim to keep duct runs short and straight. Every elbow or extra foot of ductwork reduces airflow efficiency. If going ductless, install the manufacturer's recirculation kit and the appropriate charcoal filters.
Ensure proper electrical connections are in place before installation. Most insert hoods plug into a standard outlet located inside the cabinet, but always verify the electrical requirements in your product's specifications.
Sizing Guide: Picking the Right Dimensions & CFM
Choosing the correct size for your insert range hood involves two primary factors: physical dimensions and airflow capacity measured in CFM (cubic feet per minute).
Width
Your insert should be at least as wide as your cooktop. If your stovetop is 36 inches, look for inserts in the 36 to 42-inch range. Going slightly wider provides better capture of cooking fumes at the edges. Common insert widths include 28, 30, 34, 36, 42, and 46 inches.
CFM (Airflow Power)
A useful rule of thumb is to target roughly 100 CFM per linear foot of cooktop width. For a standard 36-inch range, this translates to roughly 300 CFM as a minimum — but if you cook with high heat, use a gas range, or frequently prepare meals that generate a lot of smoke, stepping up to 350–600 CFM is a smarter move. Professional-style cooking setups may warrant even higher ratings.
Depth & Height
Do not overlook the depth and height of the insert. Make sure the unit fits within your enclosure with enough clearance for ductwork connections and electrical access. Measure your enclosure's interior carefully before purchasing, and consult the manufacturer's cutout dimensions for a precise fit.
Design Freedom & Visual Appeal
One of the strongest selling points of insert range hoods is the creative freedom they hand to homeowners and kitchen designers. Since the ventilation unit is entirely hidden, the external enclosure can be crafted from virtually any material — wood, plaster, stone, metal, tile, or a combination of finishes that match the broader kitchen design.
This makes inserts especially popular in farmhouse kitchens, Tuscan-inspired designs, contemporary minimalist spaces, and transitional kitchens where the hood surround is a major design element. Whether you envision a reclaimed wood canopy, a smooth plaster dome, or a sleek metal panel that matches your cabinetry, the insert makes it possible.
Unlike factory-finished hoods where you are limited to standard colors and shapes, the insert approach lets you tailor every visible surface to your exact taste. The hood becomes a design feature on your terms, rather than an appliance dictating your kitchen's look.
Pro Installation Tips
Measure Everything Twice
Before ordering, take precise interior measurements of your enclosure and cross-reference them with the insert's cutout specifications. Account for any protruding hardware, electrical boxes, or duct connectors that may reduce available space.
Use the Correct Duct Size
Never downsize the duct diameter below the manufacturer's recommendation. Using a smaller duct creates backpressure, increases noise, and dramatically reduces performance. Most inserts call for a minimum 6-inch round duct.
Minimize Duct Turns
Each 90-degree elbow in the duct run can reduce effective airflow by the equivalent of several feet of straight duct. Plan the most direct route possible from the hood to the exterior vent cap.
Protect the Enclosure Interior
If your hood surround is made from wood or another combustible material, line the interior with a fire-rated material or sheet metal. This protects the structure from heat buildup and extends its lifespan.
Plan for Make-Up Air
High-powered hoods (typically those above 400 CFM) may need a make-up air system to replace the air being exhausted from the home. Check local building codes — many jurisdictions require make-up air provisions for hoods above a certain CFM threshold.
Seal All Duct Joints
Use foil tape or appropriate duct sealant on every connection point. Leaky joints waste airflow and can deposit grease in areas that are difficult to clean, creating potential fire hazards over time.
Key Features & Maintenance Essentials
Fan Speeds & Noise Levels
Most quality insert hoods offer multiple fan speeds (commonly 3 to 4), allowing you to match ventilation intensity to your cooking activity. At the lowest setting, many models operate at just 2 to 3 sones — barely louder than a quiet conversation. Higher speeds ramp up as needed for heavy cooking. Some premium units feature a remote or external blower option, relocating the motor to the attic or exterior wall to cut kitchen noise even further.
Lighting
Integrated lighting is standard on virtually all insert range hoods. LED lights are the most common and efficient option, providing bright, even illumination across your cooktop without generating excess heat. Many models offer dimmable lights so you can adjust brightness to suit the moment — bright for cooking, dimmer for ambiance.
Grease Filters
Baffle filters (stainless steel) and mesh filters (aluminum) are the two most common grease filtration types in insert hoods. Baffle filters are more durable and efficient for heavy-duty cooking, while mesh filters are lighter and typically less expensive. Many are dishwasher safe — just pop them out and run them through a cycle once a month, or more often if you cook frequently.
Charcoal Filters (Ductless Only)
If you are running a ductless configuration, charcoal (activated carbon) filters sit behind the grease filters and absorb cooking odors. These filters cannot be washed — they need to be replaced on a regular schedule, typically every 3 to 6 months depending on your cooking frequency and the manufacturer's guidance.
Controls
Insert hoods feature various control styles — from simple mechanical sliders and push buttons to digital touch panels and even remote controls. Since the control panel is typically located on the underside of the insert, make sure it is accessible and intuitive from your cooking position. Some higher-end models include automatic heat sensors that adjust fan speed based on cooking temperature.
Explore Top Insert Range Hood Picks
Ready to upgrade your kitchen ventilation with a sleek, hidden insert range hood? Explore our curated selection of top-rated insert hoods, remote fan units, and accessories designed to deliver powerful, whisper-quiet performance while blending seamlessly into your custom kitchen design.