

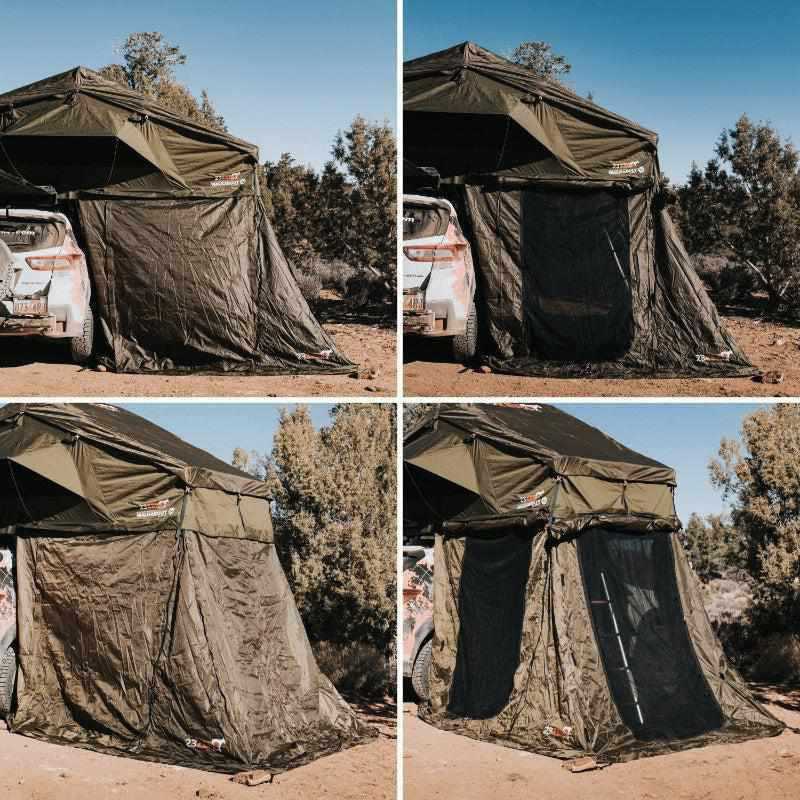
Off-roading is one of the purest forms of adventure — but that doesn't mean comfort has to stay behind. Rooftop tents transform your vehicle into a mobile campsite, lifting your sleeping space off the ground and delivering a far better night's rest than anything a ground tent can offer. To get the best out of your rooftop tent, though, the installation needs to be done right from the start.
The good news: mounting a rooftop tent is genuinely straightforward. This guide will walk you through every stage of the process — from gathering your materials to completing your setup and hitting the trail with confidence. Always refer to your specific tent's user manual alongside this guide, as installation details can vary between models.
Gathering Your Materials
Not all rooftop tents install identically — the process varies between hardshell and softshell models, and between different brands. Before you begin, gather everything you need and lay it out in one place so nothing gets lost during the process. Small mounting components are easy to misplace on a garage floor.
Check your tent's manual and confirm the manufacturer packed every listed component before you start. A typical rooftop tent installation requires the following parts:
- Mounting bolts — the primary fasteners that secure the tent to your rack
- Side plates — positioned first before inserting into the mounting channel
- Mounting rail end caps — placed on the channel after everything is secure
- Mounting plates — inserted at the base of the bolts and secured with Nylock nuts
- Awning straps — used to secure side and front awning panels once the tent is open
- Ladder — your access point; confirm it's included and undamaged
Once you've confirmed everything is present and accounted for, find a stable place to set each component down. You'll be handling small hardware, so working on a clean, flat surface makes a significant difference.
Pro Tip: Have a second person available during installation. While it's technically possible to mount a rooftop tent solo, a partner makes it considerably easier to position the tent correctly on the rack and secure hardware without anything shifting.2
Mounting the Hardware
With your materials ready and a helper by your side, it's time to get the tent onto the vehicle. A clean installation comes down to working through the components in the correct order — don't rush, and don't fully tighten anything until everything is positioned correctly.
Begin by placing the tent on your roof rails. Position it carefully so it sits centred and flush with the rack. At this stage, do not fasten anything tightly — you want the freedom to adjust the tent's position before committing.
Next, place the bolts in the side plates before sliding them into the mounting channel. Work methodically from one side to the other. Once the bolts are sitting correctly in the channel, carefully insert the mounting plates at the base of each bolt. Secure the mounting plates using your Nylock nuts — tighten these down firmly, but check alignment one final time before applying full torque.
Double-check that every component is in the correct position and that the tent feels stable on the rack before moving on. Nothing should wobble or shift when the tent is closed. Once satisfied, fit the plastic end caps onto the mounting channel to finish the hardware installation cleanly.
Important: Do not over-tighten bolts during initial positioning. Snug everything down gradually, confirm alignment, then apply final torque. This prevents thread damage and ensures even clamping pressure across the mounting channel.
"A properly mounted rooftop tent feels as solid as the vehicle itself — no movement, no rattles, no second-guessing at highway speed. Take the time to do it right the first time."
Completing Your Setup
Before you take the vehicle anywhere, practice opening and closing the tent at least once. Knowing exactly how your tent deploys means fewer frustrations at the campsite after a long drive — and it helps you confirm everything is functioning correctly before you're miles from the nearest town.
Once the hardware is fully secured, your tent should be stable and ready to open. Release the lid-securing straps that hold the tent closed during travel. These straps are strong enough to keep the tent firmly shut on rough roads, but release easily when you're ready to set up camp.
With the straps released, open the lid completely. Extend the tent ladder outward — this is your access point at all times, so make sure it deploys smoothly and locks into position. Rotate the floor section to bring it into a fully horizontal sleeping position. The floor should sit level and firm once extended correctly.
With the tent fully open and the ladder extended, climb up and check the interior. The sleeping surface should feel solid underfoot with no flex or instability. If anything feels off, descend and check that the floor section has rotated fully into position before proceeding.
Finishing Touches
With the tent open and the ladder in place, there are a few final setup details that separate a good camping experience from a great one. Confirm your ladder is positioned at approximately a 60-degree angle — this is the optimal angle for safe, comfortable access up and down throughout your stay.
If your tent includes awning panels — and many models do — now is the time to get them ready. Locate the awning straps and identify the front and side window awnings. Look for the mounting holes at the base of each awning panel, thread the straps through the mounting holes, and guide them securely through the eyelets in the tent fabric.
Once the awning straps are properly secured, your tent is fully open, ventilated, and ready for use. You're set up and ready for the night ahead.
Ventilation check: Before settling in for the night, ensure all windows and vents are positioned to allow adequate airflow. Good ventilation reduces condensation buildup inside the tent and keeps temperatures comfortable — particularly important on warm summer nights.
Post-Installation Tips for the Best Experience
Now that you know how to mount your rooftop tent correctly, keep these practical tips in mind every time you arrive at camp.
Set Up on Stable Ground
Always park on the flattest, firmest ground available before opening your tent. Uneven terrain creates an uncomfortable sleeping angle and puts unnecessary stress on your mounting hardware over time.
Use Wheel Chocks
Bring a set of wheel chocks to every trip. If perfectly level ground isn't available, chocks keep your vehicle stable and prevent any unwanted rolling — giving you a safer, more comfortable night.
Check Your Ladder Clearance
Always measure the space available around your vehicle before opening the tent. The ladder needs clear, unobstructed ground to extend fully — a detail that matters far more in tight campsites than it seems.
Inspect Hardware Regularly
After every few trips, check that all mounting bolts remain tight and that the channel end caps are still securely in place. Vibration from off-road driving can gradually loosen fasteners over time.
Ready to Install. Ready to Explore.
You now have everything you need to mount your rooftop tent correctly and get the most out of every trip. Before heading out, re-read your specific tent's user manual one final time — the details vary between models, and knowing your equipment inside out pays dividends in the field.
Use the knowledge from this guide alongside your manual, and you'll have your tent mounted, tested, and ready to go before your next adventure begins.
Shop the 23ZERO Walkabout 87" 2.0
Ready to upgrade your setup? The 23ZERO Walkabout 87" 2.0 6-Person Roof Top Tent is engineered for straightforward installation, fast deployment, and serious family comfort — wherever the trail takes you.
Walkabout 87" 6-Person Tent